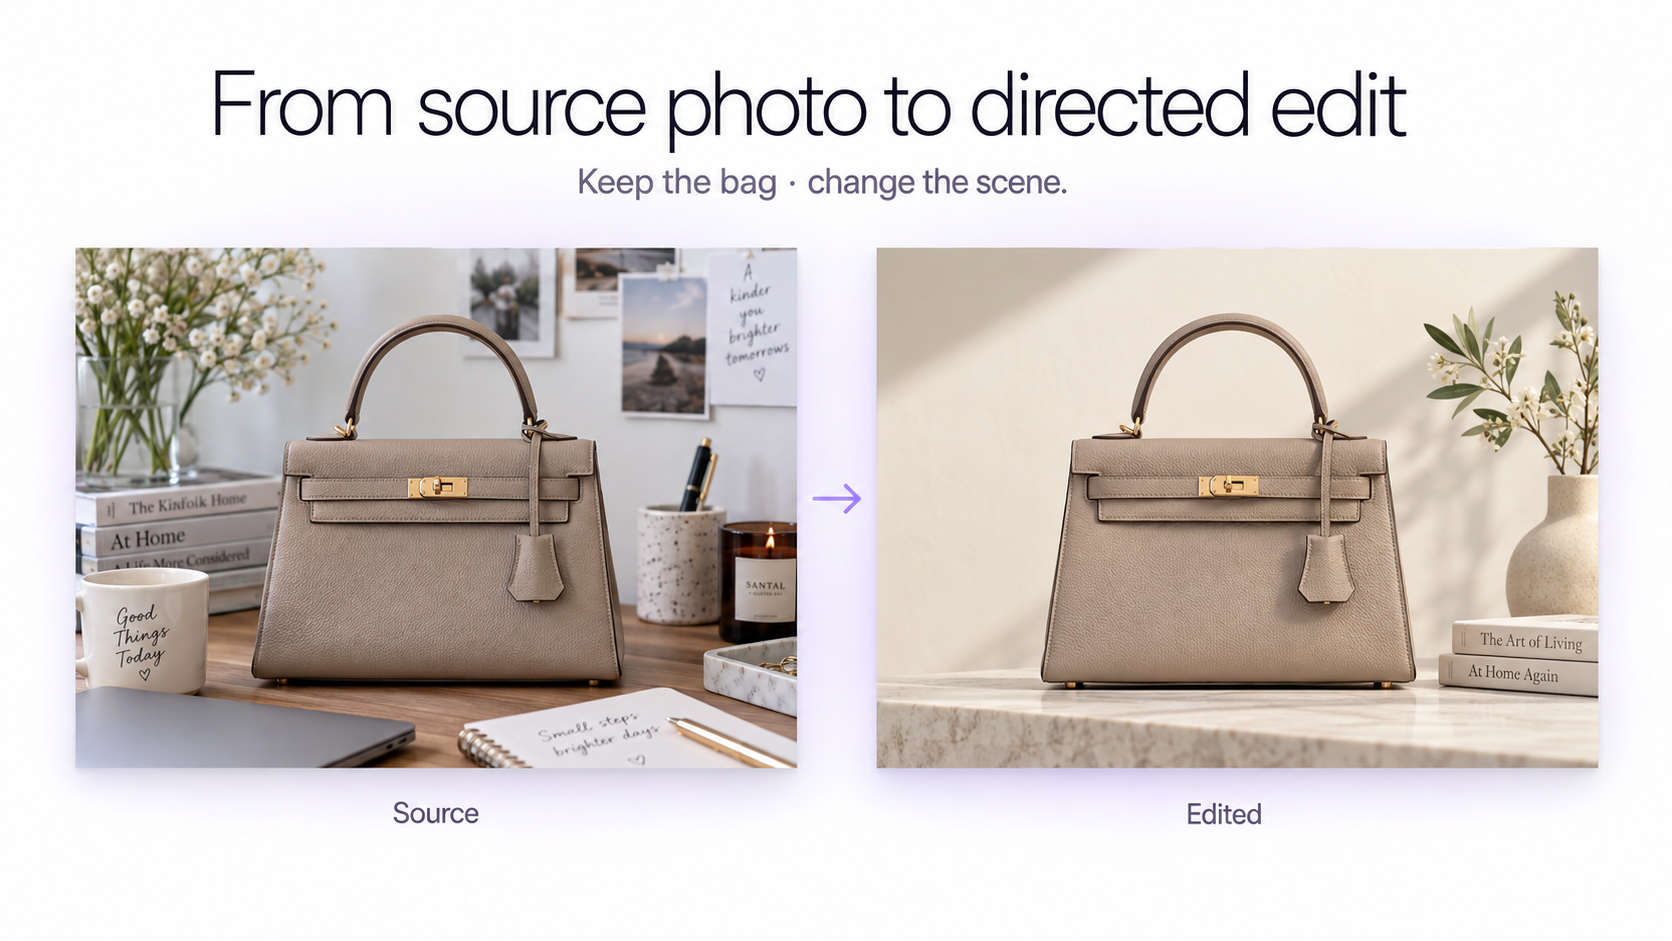
AI photo editing has moved far beyond automatic filters and one-click enhancements. You can now upload an existing image and describe changes such as removing an object, replacing a background, changing the lighting, recoloring a product, altering clothing, improving a portrait, redesigning an interior, or turning a simple product photo into a complete commercial photoshoot.
The biggest change is how you communicate the edit. Instead of manually masking every object, adjusting dozens of sliders, and rebuilding a scene layer by layer, you can increasingly describe the result you want in natural language.
But prompting is only one way to use AI. For repeatable tasks such as product photography, jewelry photography, beauty campaigns, fashion photoshoots, and interior visualization, specialized AI workflows and templates can be faster and more predictable.
What is AI photo editing?
AI photo editing uses generative and computer-vision models to understand the contents of an existing image and modify them based on an instruction, reference image, predefined workflow, or template.
Traditional photo editing usually changes pixels through manual tools such as selections, masks, brushes, layers, color adjustments, and cloning. AI editing can interpret higher-level requests instead. You can ask it to make a room warmer, place a bottle on a stone pedestal, remove a distracting object, change a dress from black to red, or create softer studio lighting.
Three ways to edit photos with AI
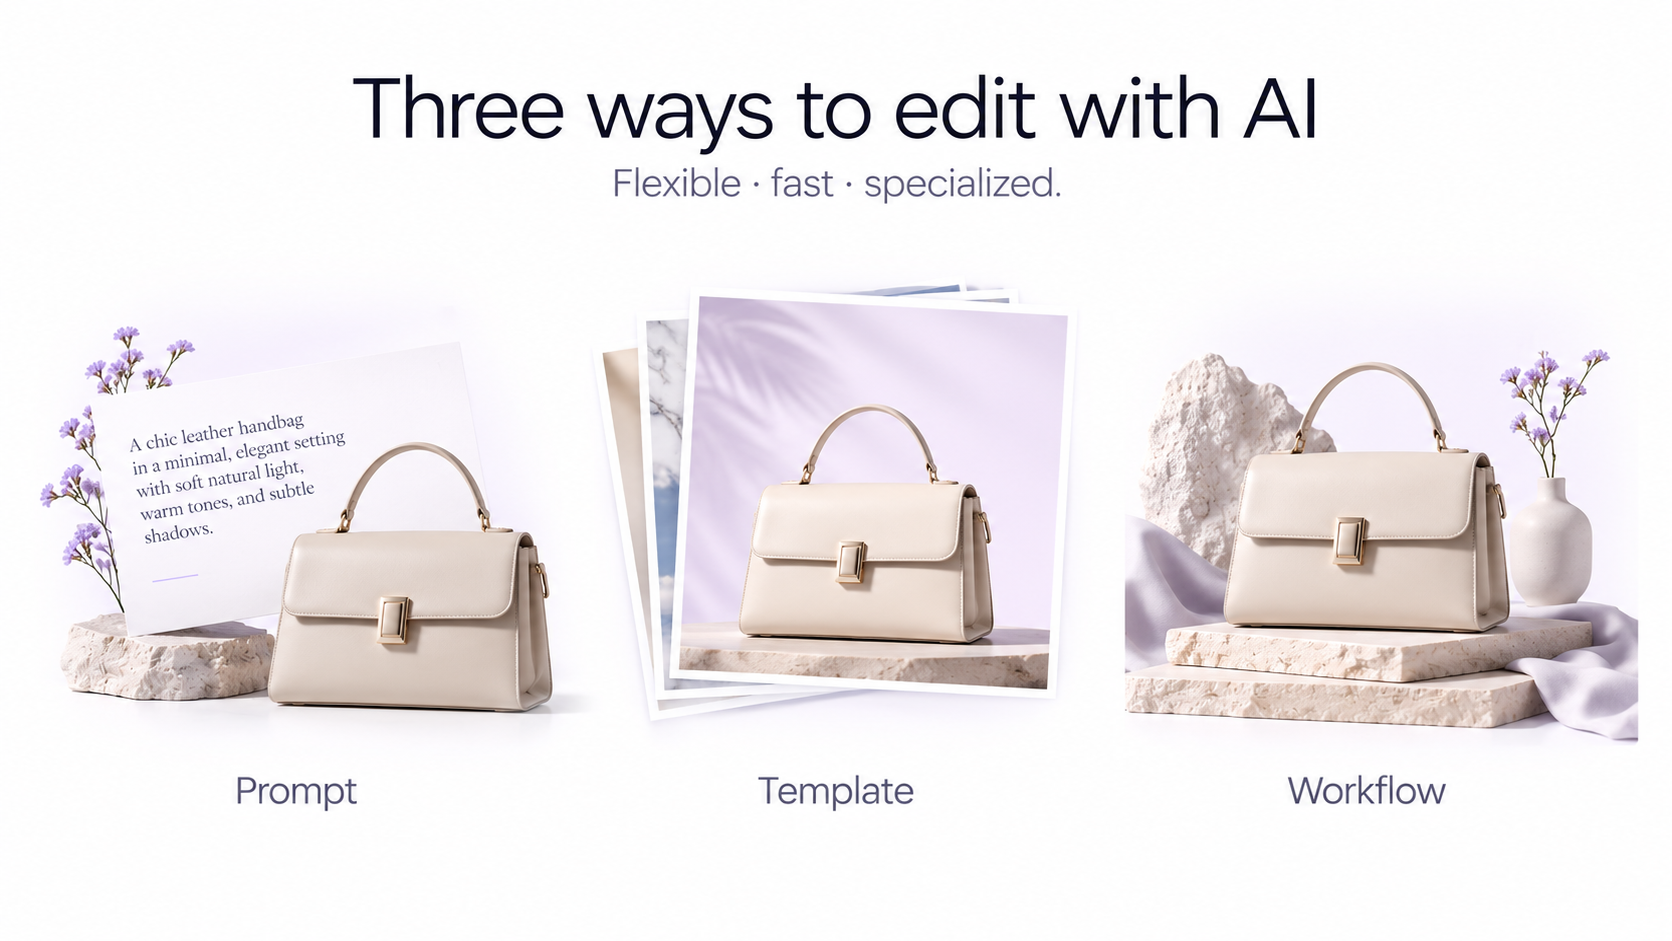
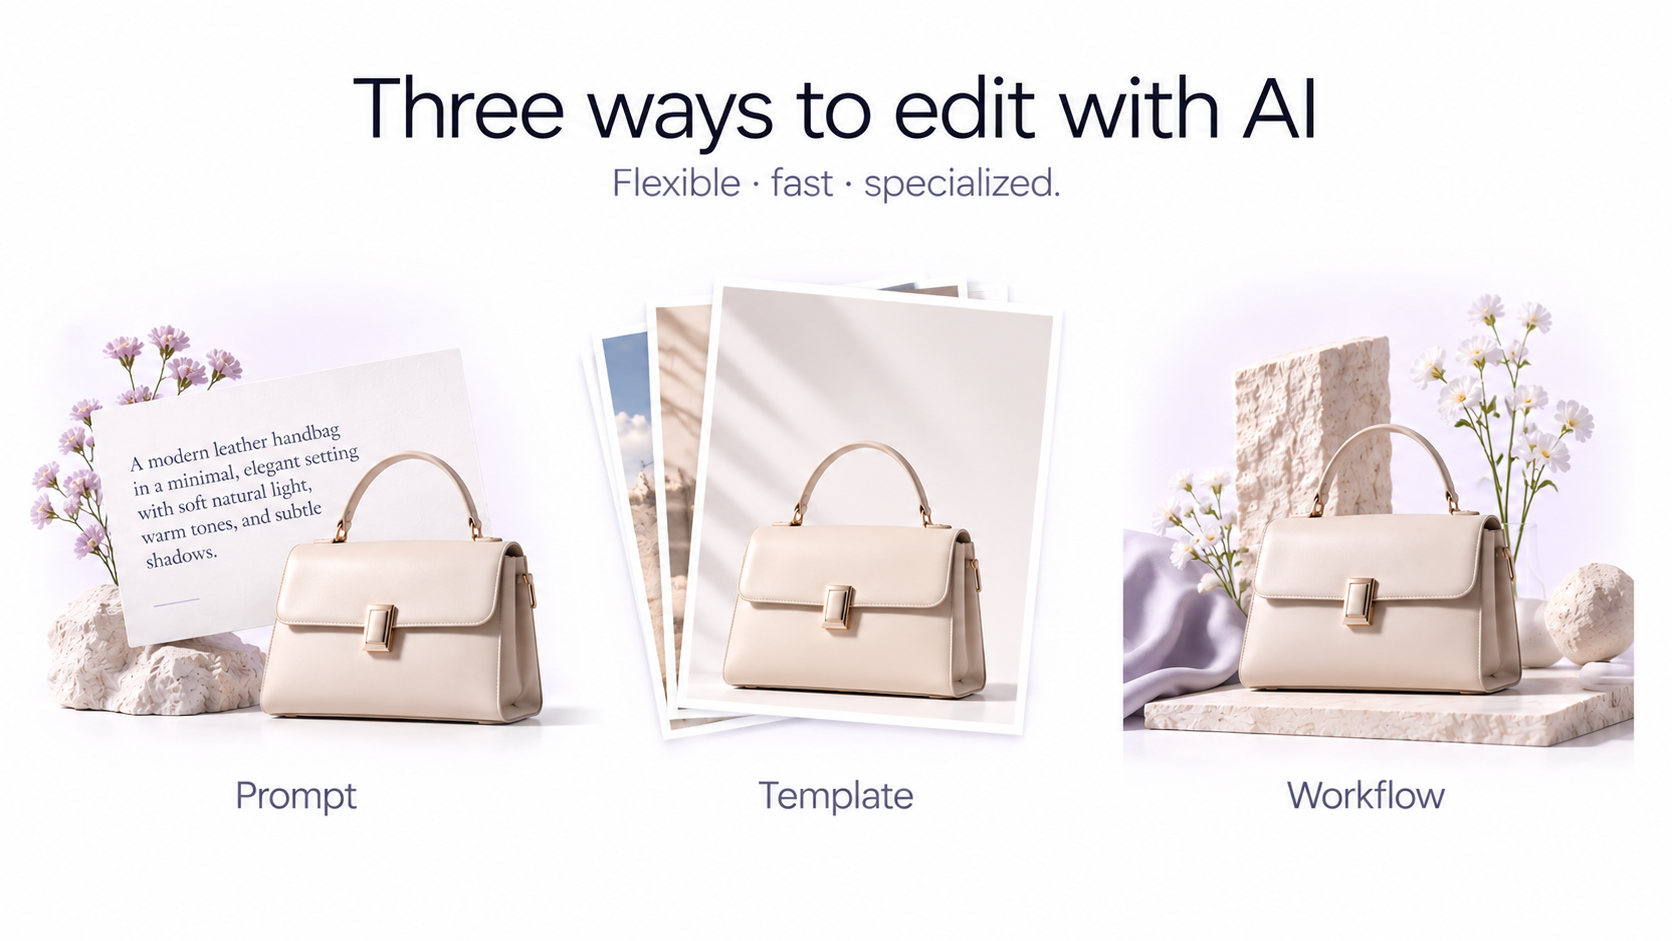
Not every edit should start with an empty prompt box. The right method depends on how specific your goal already is.
1. Edit with a natural-language prompt
Prompt-based editing is the most flexible option. Upload a photo and describe what should change and what should remain the same.
For example: “Place this serum bottle on a pale travertine vanity with soft morning window light. Keep the bottle shape, label, cap, and proportions unchanged.”
This method works particularly well when you know the final visual you want or need to make an unusual edit that does not fit a predefined template.
2. Start with an AI template
Templates remove much of the prompting work. Instead of describing the complete composition yourself, you choose an existing visual direction and upload the image you want adapted to it.
This is useful when you already like a particular composition, lighting setup, photoshoot style, background treatment, seasonal campaign, or commercial aesthetic.
Templates are especially practical when creating multiple visuals that should follow a similar creative direction.
3. Use a specialized AI workflow
A general AI editor has to interpret almost any possible request. A specialized workflow starts with more context about the type of image you are creating.
GenImagePro, for example, provides dedicated workflows for use cases including product photography, beauty, jewelry, fashion photoshoots, portraits, food, interiors, background replacement, and creative transformations. For guided whole-frame edits, start with the AI Image Editor.
If you are editing an earring product photo, a jewelry-oriented workflow can focus on the things that matter for jewelry imagery: scale, metal reflections, surface detail, placement, macro-style lighting, and presentation. A fashion workflow has a different problem to solve, including garments, body placement, fabric behavior, posing, and editorial composition.
How to edit a photo with AI step by step
Step 1: Start with the best source image you have
AI can transform an imperfect photo, but source quality still matters. Use an image where the important subject is clearly visible and reasonably sharp. If you want to preserve a product, face, outfit, piece of furniture, or other specific object, make sure the features that identify it are visible in the original.
A clean smartphone photo is often enough. You do not necessarily need a professionally photographed source image before you begin.
Step 2: Decide what must stay unchanged
Before describing what you want to change, decide what you need the AI to preserve.
For a product image, that may be the package shape, cap, proportions, branding, label, and product color. For a portrait, it may be facial identity and hairstyle. For fashion, it may be the garment. For an interior, it may be the architecture while the furniture and styling change.
Explicitly mentioning important preserved elements can make your instruction more precise.
Step 3: Describe the change
You do not need to write a long technical prompt. Start with the actual edit.
Instead of: “Make this better.” Try: “Replace the background with a warm minimalist bathroom and add soft natural morning light.”
Instead of: “Professional product photo.” Try: “Place the bottle upright on a pale stone pedestal in a clean skincare campaign scene with diffused side lighting and a soft contact shadow.”
Step 4: Generate the first version
Treat the first result as a starting point rather than assuming the entire image has to be perfect immediately.
Look at the major decisions first: composition, subject preservation, lighting, perspective, colors, and overall visual direction.
Step 5: Refine the result with follow-up instructions
One of the most useful parts of conversational AI editing is iteration. In GenImagePro, you can continue from the generated result and ask for further changes instead of restarting the entire edit.
A workflow might look like this: 1. “Put this perfume bottle on a dark reflective stone surface.” 2. “Make the lighting softer and more editorial.” 3. “Remove the flowers in the background.” 4. “Make the surface slightly lighter.” 5. “Keep everything else exactly the same.”
Breaking complex transformations into several edits can give you more control than trying to fit every decision into one enormous prompt.
What can you edit with AI?
Change a photo background
AI can replace an existing environment while keeping the main subject. This can range from a simple studio background to a completely new lifestyle or campaign scene.
Example prompt: “Replace the background with a warm cream studio wall and limestone floor. Add soft directional daylight from the left and keep the chair unchanged.”
Remove unwanted objects
You can remove distractions, props, people, furniture, packaging elements, or other unwanted objects. The AI reconstructs the missing area using information from the surrounding scene.
Example prompt: “Remove the lamp on the left and naturally reconstruct the wall and floor behind it. Do not change the rest of the room.”
Add new objects
AI can introduce new objects while attempting to match the existing perspective, lighting, scale, shadows, and environment.
Example prompt: “Add a small folded white towel beside the skincare bottle, matching the current light direction and perspective.”
Change colors
Recoloring can be useful for clothing variations, product concepts, furniture, packaging exploration, interiors, or creative campaigns.
Example prompt: “Change the handbag from black leather to deep burgundy leather while preserving its shape, stitching, hardware, texture, and proportions.”
Change lighting
Lighting can completely change the perceived quality of an image. AI can reinterpret an ordinary source photo with diffused daylight, dramatic studio lighting, warm sunset light, beauty lighting, hard directional shadows, or another photographic setup.
Example prompt: “Change the lighting to soft premium beauty lighting with a large diffused source from the upper left, subtle facial highlights, and gentle shadows.”
Edit product photos
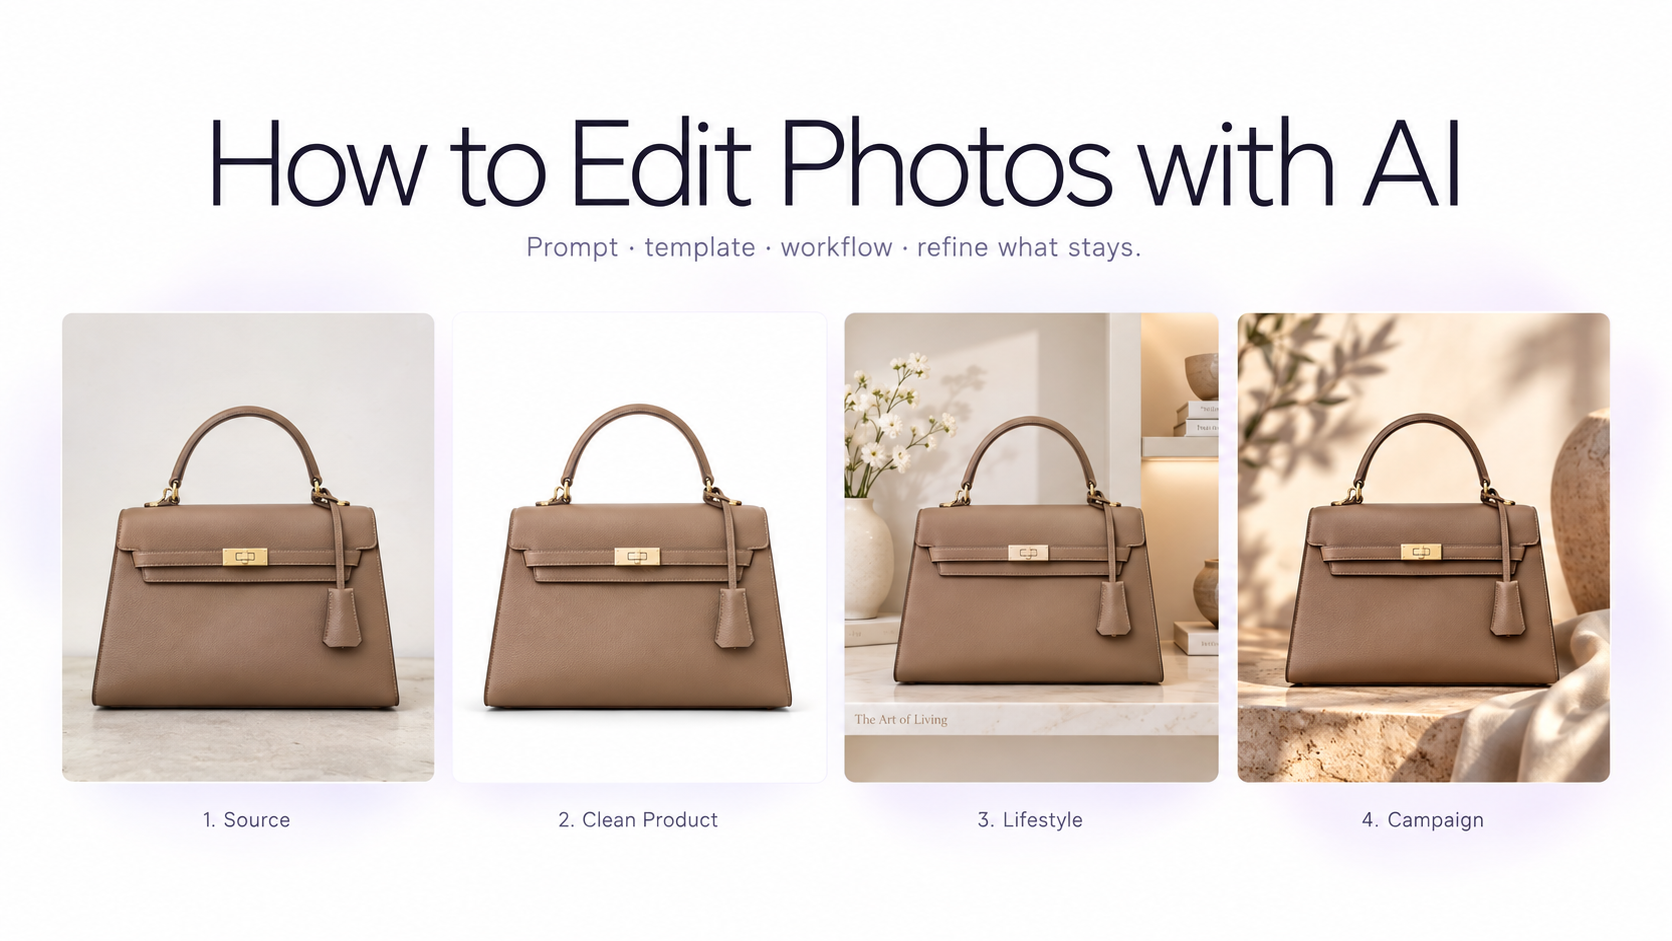
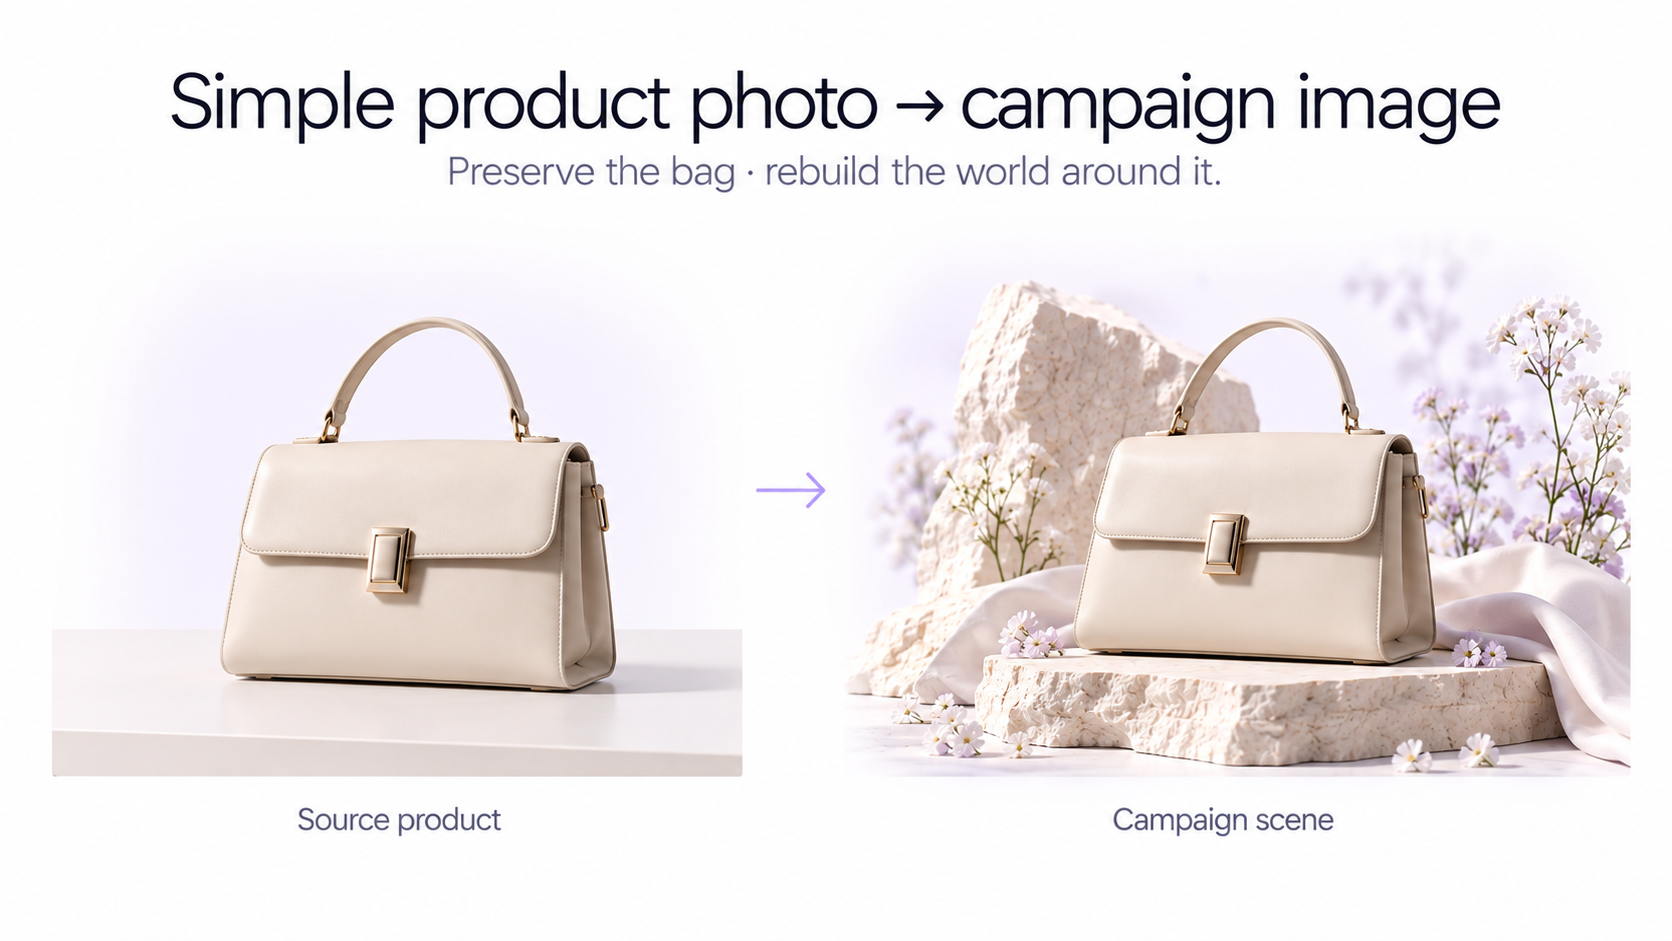
Product editing is one of the most useful commercial applications of generative AI. A simple product photo can become a studio image, contextual lifestyle photograph, seasonal campaign, social creative, marketplace image, or advertising visual.
Example prompt: “Place this sunscreen tube upright on pale sand with a soft curved shadow, clean daylight, subtle blue sky reflection, and premium skincare campaign photography. Keep the package design and proportions unchanged.”
Edit portraits and beauty photos
AI portrait editing can change lighting, styling, makeup direction, hair, clothing, environment, and overall visual treatment while using the original portrait as the reference.
For beauty photography, subtle instructions usually work better than vague requests to completely beautify a face.
Example prompt: “Create clean editorial beauty lighting with soft luminous skin, restrained natural makeup, subtle highlights on the cheekbones, and a neutral cream studio background.”
Edit fashion photos
AI can change the environment, visual style, lighting, styling, and clothing-related elements of a fashion image. Specialized fashion photoshoot workflows are particularly useful because the relationship between the person, garment, fabric, pose, and scene matters.
Example prompt: “Turn this into a minimalist luxury fashion campaign photographed in a pale limestone gallery. Use directional afternoon light and keep the model and main garment recognizable.”
Edit jewelry photos
Jewelry requires special attention because thin geometry, polished metal, gemstones, reflections, and scale are easy to distort. A dedicated jewelry workflow can be preferable to a broad generic prompt.
Example prompt: “Create a luxury macro campaign photograph of these earrings on a smooth ivory sculptural surface with controlled soft reflections and elegant directional light. Preserve the exact jewelry design.”
Edit interior photos
AI can redesign a room, replace furniture, alter materials, change decor, adjust lighting, or explore a completely different interior direction while preserving the architecture.
Example prompt: “Redesign this living room in warm contemporary Japanese minimalism with pale oak, textured cream fabrics, low furniture, and soft indirect daylight. Preserve the room dimensions and windows.”
How to write better AI photo editing prompts
A useful editing prompt usually answers four questions: What should change? What should stay? What should the new result look like? How should the scene be photographed?
A simple formula is: [Edit] + [Preserve] + [Environment or appearance] + [Lighting/style]
For example: “Place the perfume bottle on a dark burgundy pedestal. Preserve the bottle, cap, label, proportions, and glass color. Create a minimal luxury studio environment with a deep red background, controlled reflections, soft directional light, and a realistic contact shadow.”
Tell the AI what to preserve
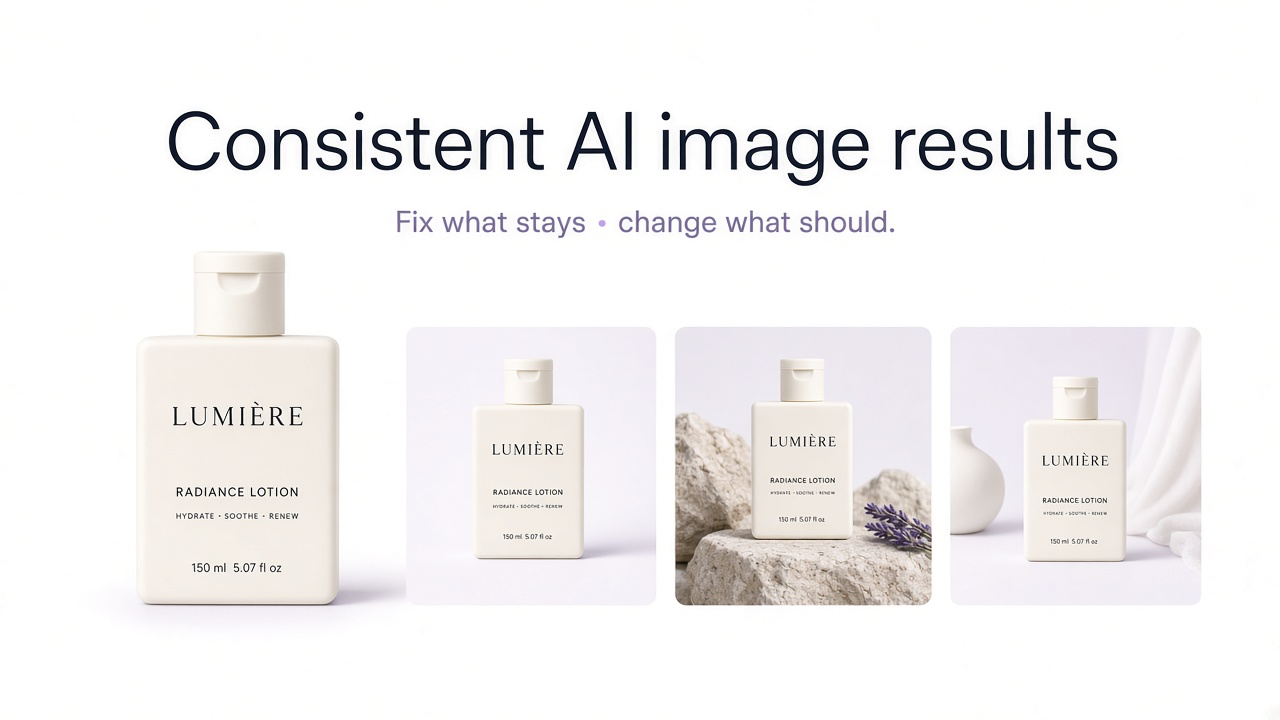
This is particularly important when editing real products, fashion items, jewelry, or people. If the exact identity of something matters, say so.
Describe visual properties instead of vague quality words
“Make it professional” can mean almost anything. Describe what makes the image feel professional: controlled reflections, diffused studio light, balanced composition, clean shadows, realistic materials, shallow depth of field, or a particular photographic environment.
Make one important correction at a time
If the first result is almost right, do not rewrite the entire prompt. Tell the AI what needs fixing: “Keep the composition but reduce the shadow,” “Make the background warmer,” or “Remove only the object on the left.”
Use reference images when words are not enough
Some visual ideas are easier to show than describe. Multiple reference images can provide additional context for a product, person, styling direction, composition, material, environment, or desired visual treatment.
AI templates vs. prompts: Which should you use?
Use a template when you already like the composition or visual style and want a fast, repeatable result. Use a specialized workflow when your subject has specific requirements, such as jewelry, fashion, beauty, products, or interiors. Use conversational prompting when the edit is unique, highly specific, or requires several rounds of refinement.
You do not have to choose only one method. A practical workflow is to begin with a template or specialized photoshoot, generate the initial image, and then continue editing the result conversationally.
Common AI photo editing mistakes
Trying to change everything at once
Extremely long prompts that simultaneously change the environment, subject, pose, styling, lighting, camera position, materials, and composition can make it harder to identify what went wrong. Start with the major transformation and refine from there.
Not specifying what must stay unchanged
If product accuracy or identity matters, preservation instructions should be part of the prompt rather than implied.
Using a generic workflow for a specialized subject
Jewelry, beauty, fashion, products, food, and interiors have different photographic requirements. When a dedicated workflow exists, use it instead of forcing every task through the same generic editor.
Giving up after the first generation
AI image editing is iterative. If the composition is right but one detail is wrong, refining that detail is usually more efficient than starting the whole process again.
How to edit photos with AI in GenImagePro
GenImagePro gives you several starting points depending on the job. The AI Image Editor is the fastest path when you want to restyle, refine, remove objects, replace a background, or expand a photo you already have.
For a fast visual transformation, choose a template that already matches the direction you want. For specialized work, start with a workflow such as product photography, fashion, beauty, jewelry, portraits, food, interiors, background replacement, or creative editing. For a completely custom change, use conversational AI editing and describe the transformation directly.
After creating the first image, continue refining it through follow-up instructions. You can remove or add objects, change colors, modify lighting, alter clothing or styling, adjust product placement, change the environment, improve portraits, or correct details without treating every edit as an entirely separate project.
You can also work with multiple source or reference images when the edit needs more visual context.
A practical product-editing example
Imagine you only have a basic photo of a skincare bottle taken against an ordinary background.
You could start with a GenImagePro product photography template and create a clean campaign scene. If the result is close but not perfect, continue with instructions such as: “Make the stone pedestal slightly warmer.” “Use softer window light from the upper left.” “Remove the plant in the background.” “Move the product slightly toward the center.” “Keep the product exactly the same and make the scene more minimal.”
The workflow becomes less about generating one perfect image from one perfect prompt and more about directing the image toward the result you want.
When should you use traditional editing instead?
AI is particularly useful for generative changes, visual exploration, environment replacement, product scene creation, object editing, styling, and rapid creative variations.
Traditional pixel-level editing can still be preferable when you need exact manual control over a tiny region, strict typography placement, precise vector shapes, complex layer compositing, or technically exact retouching. AI and traditional tools are increasingly complementary rather than mutually exclusive.
The future of photo editing is conversational
The interface between an idea and an edited image is becoming simpler. Instead of learning which tool controls shadows, masks, object removal, relighting, or scene generation, users can increasingly describe the visual outcome they want and refine it through conversation.
At the same time, templates and specialized workflows remain valuable because not every user wants to art-direct an image from scratch. The most practical AI editing systems combine both approaches: structured workflows when you want speed and consistency, and natural-language editing when you want control.
Frequently Asked Questions
Can AI edit an existing photo?
Yes. Modern AI photo editors can use an existing image as the starting point and modify specific elements or transform the wider scene. Common edits include changing backgrounds, removing objects, adding objects, recoloring elements, changing lighting, editing clothing, retouching portraits, and transforming product photography.
How do I edit a photo using AI?
Upload the image to an AI photo editor, choose a template or specialized workflow if appropriate, or describe the edit in natural language. Generate the first version, review what changed, and use follow-up instructions to refine individual details.
What should I write in an AI photo editing prompt?
Describe what should change, what should remain unchanged, what the new environment or appearance should look like, and any important lighting or photographic details. Specific visual instructions usually work better than vague requests such as 'make this professional.'
Can AI remove objects from photos?
Yes. AI can identify an unwanted object, remove it, and reconstruct the area behind it based on surrounding visual information.
Can AI change the background of a photo?
Yes. AI can replace an existing background with another environment while keeping the main subject. This can include simple studio backgrounds, uploaded references, lifestyle environments, or fully generated scenes.
Can AI edit product photos?
Yes. AI can change product backgrounds, adjust lighting, create new product placements, generate studio and lifestyle scenes, add or remove props, and produce multiple creative directions from the same source product image.
Can I keep editing an AI-generated result?
Yes. In conversational editing workflows such as GenImagePro, the first generation can become the starting point for further instructions. You can keep refining individual elements instead of recreating the image from the beginning.
Are templates better than AI prompts?
They solve different problems. Templates are useful when you want a predefined visual direction quickly. Prompts provide more flexibility. Specialized workflows can offer additional context for subjects such as products, fashion, beauty, jewelry, food, or interiors. A strong workflow can combine all three.
Can AI use more than one reference image?
Yes, some AI editing workflows support multiple source or reference images. This can be useful when additional visual references are needed for a product, person, material, style, scene, or other aspect of the edit.