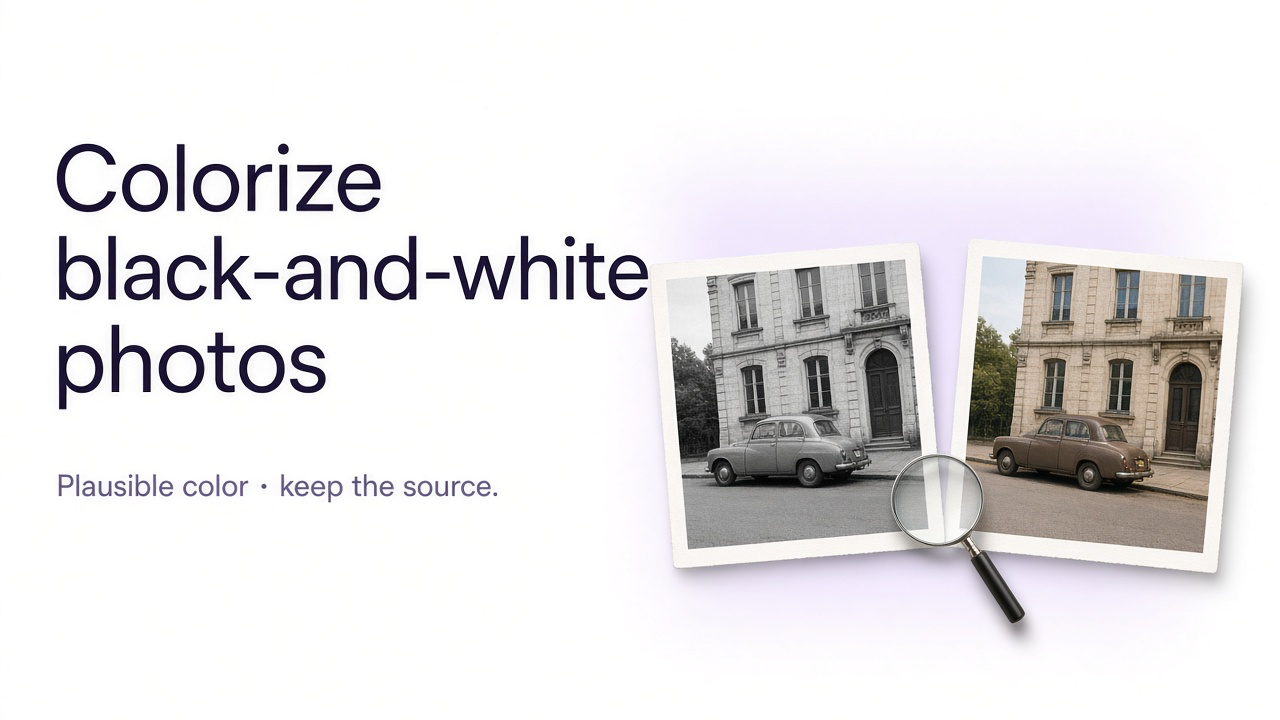
Colorizing a black-and-white photo can make an old family image or historical scene feel much more immediate. Skin, clothing, furniture, buildings, vehicles, landscapes, and small objects suddenly become easier to interpret because we are used to seeing the world in color.
But AI colorization needs one important qualification: if the original photograph never recorded color information, an AI model cannot recover the exact missing colors from the grayscale pixels alone. It can infer plausible colors from visual context and learned patterns, but a brown coat might originally have been navy, a beige wall might have been pale green, and a car could have been almost any available factory color.
The right goal is therefore not to make the photograph look as colorful as possible. It is to create a believable color interpretation while preserving the actual information that the original photo does contain.
Colorization, color restoration, and photo restoration are different
These processes are often grouped together, but they solve different problems.
| Process | What it does | When to use it |
|---|---|---|
| Colorization | Adds inferred color to a photograph that was originally captured in black and white | The source contains no original color information |
| Color restoration | Attempts to recover or rebalance color already present in a faded color photograph | The original photo was taken in color but has faded or shifted |
| Photo restoration | Repairs scratches, tears, dust, creases, missing areas, blur, fading, or other physical and scanning damage | The photograph itself is damaged or degraded |
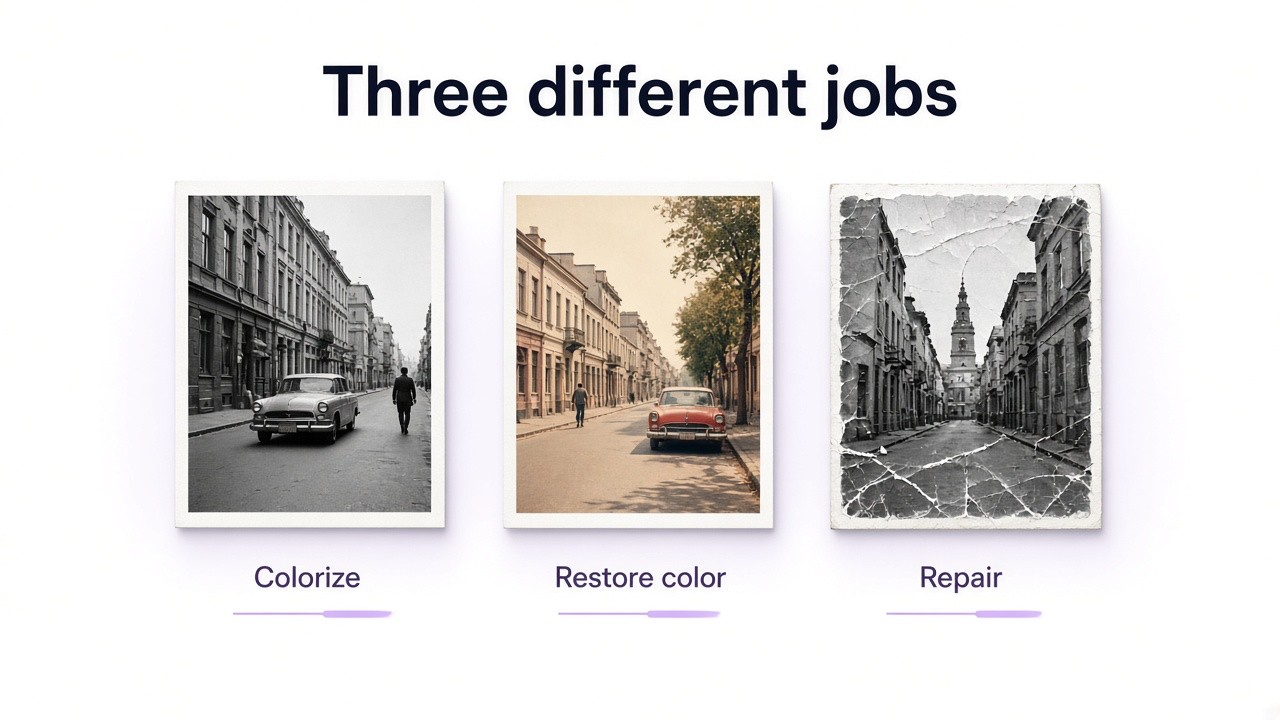
A single old photograph may need more than one of these. For example, you may first restore scratches and damaged facial details and then create a colorized version. If the source is a faded color photograph rather than a true black-and-white image, color restoration is the more accurate starting point.
For damage repair beyond color, see How to Restore Old Photos with AI.
How to colorize a black-and-white photo
Work from the best source, keep the original file, and colorize conservatively before you correct individual colors.
1. Start with the best version of the original
AI colorization is easier when the source image already contains clear tonal information. Faces, clothing boundaries, hair, objects, and background elements should be as visible as possible.
If you have a physical photograph, scan it rather than photographing it casually under room light. If several digital copies exist, use the version with the highest useful resolution and the least compression.
Use the strongest source available
Original scan instead of a screenshot
Largest clean digital copy available
Good contrast between important objects
No unnecessary social-media compression
Minimal glare or reflections from photographing a printed image
Full original crop when possible
Current AI colorization tools also tend to perform better when the photograph has useful contrast and exposure. If a face is almost completely blown out or a coat has collapsed into featureless black, the model has less information to work with.
2. Repair serious damage before colorizing
You do not need to make an old photograph perfect before adding color, but major physical damage can confuse the colorization step.
A deep crease running through a face, a missing section of clothing, large stains, or severe fading may cause the model to interpret areas incorrectly. Repair those structural problems first, then colorize the cleaner version.
Fix first when the photo has
- Large tears or missing areas
- Heavy scratches across faces
- Strong dust or scanning artifacts
- Severe fading
- Very low contrast
- Major blur or pixelation
3. Keep the original black-and-white photo
Never treat the colorized file as a replacement for the original.
The black-and-white photograph is the historical source. The colorized version is an interpretation derived from it. Keep both files and make it clear which is which, especially for family archives, genealogy, research, museums, publications, or historical collections.
A simple naming convention can help: keep the archival scan unchanged and save a separate file such as family-photo-1948-colorized.
4. Colorize the whole photo conservatively first
Start with a balanced automatic interpretation instead of specifying dozens of individual colors immediately.
This gives you a first pass for skin, hair, clothing, sky, vegetation, wood, metal, architecture, and other common materials. You can then identify which areas need correction rather than manually directing every object from the beginning.
5. Check skin tones carefully
Faces draw attention immediately, so incorrect skin color can make an otherwise convincing colorization feel artificial.
Look for unnatural orange, red, gray, green, or overly uniform skin. The face, hands, neck, and other visible skin should also belong to the same lighting environment.
Do not let colorization become portrait beautification. Preserve age, facial structure, natural lines, freckles, skin texture, and distinctive features unless you are separately performing a restoration.
6. Treat clothing colors as inferences unless you have evidence
A grayscale photograph may tell you that one jacket was darker than another, but it usually cannot tell you whether that jacket was dark green, navy, burgundy, brown, or black.
For ordinary family photographs, a plausible restrained interpretation may be enough. If historical accuracy matters, research the garment before specifying a color.
Useful clothing references can include
- Military or service uniform regulations
- School uniform records
- Family recollections
- Fashion catalogs from the period
- Other photographs from the same event
- Known company or sports-team colors
7. Research historically important colors
For a casual family photo, perfect historical color accuracy may not be essential. For archival, educational, journalistic, or museum-related work, it matters much more.
Do not ask AI to guess when the correct color can be researched.
| Object | Possible reference |
|---|---|
| Military uniform | Official uniform guides, museums, period color photos |
| Vehicle | Manufacturer paint catalogs and surviving examples |
| Building | Architectural records, preservation archives, later color photographs |
| Flag or insignia | Historical reference material |
| Branded product | Period packaging, advertisements, catalogs |
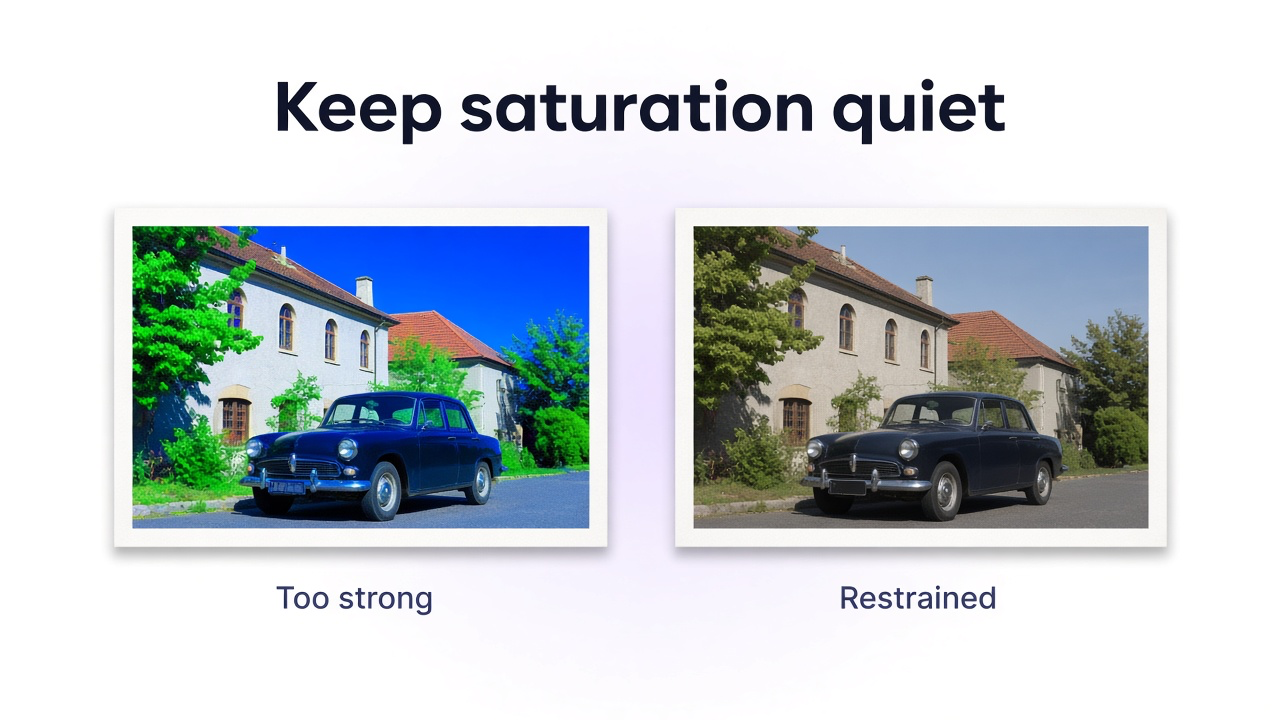
8. Keep saturation under control
One of the easiest ways to make an old photograph look artificially colorized is to push every color too far.
Skin becomes orange, grass turns intense green, the sky becomes electric blue, and clothing suddenly looks like modern advertising photography.
A restrained palette is usually more convincing. Remember that lighting conditions, film response, aging, exposure, and the surfaces themselves would all affect how color appeared in the original scene.
9. Preserve the original lighting
Color should belong to the light already present in the black-and-white photograph.
A shaded face should not suddenly have bright warm skin while the rest of the scene remains cool. A white shirt in shadow should not become the same brightness and color as one in direct sunlight.
Use the original tonal structure as a guide. Highlights, midtones, and shadows contain valuable information about how the scene was illuminated even when hue is missing.
10. Check boundaries between objects
Automatic colorization can sometimes allow one color to bleed into another region.
Zoom in around
- Hair against skin
- Hands against clothing
- Jackets against background walls
- Trees against sky
- Vehicles against roads
- Small accessories and jewelry
These mistakes are easier to catch at full size than in a small before-and-after preview.
11. Preserve period materials and surfaces
Colorization should not quietly modernize the material itself.
Old wood, painted plaster, wool clothing, aged metal, leather, paper, stone, early plastics, and period textiles have visual characteristics beyond hue. Keep their original texture, wear, reflectivity, and tonal variation.
An old wooden table should not become polished contemporary furniture simply because the model is adding brown. A worn coat should not become smooth synthetic fabric.
12. Be careful when colorizing very damaged faces
If facial detail is badly damaged, colorization and reconstruction can become mixed together. The result may look more vivid and realistic while containing facial details that were not actually visible in the source.
When identity matters, restore conservatively first. Compare eyes, nose, lips, jawline, hairline, expression, age, and distinctive features against the original before accepting the colorized version.
How to colorize a black-and-white photo with GenImagePro
With GenImagePro, you can start from the photograph itself rather than describing the entire historical scene from scratch. The uploaded image provides the people, composition, clothing, objects, architecture, and tonal information that need to remain intact.
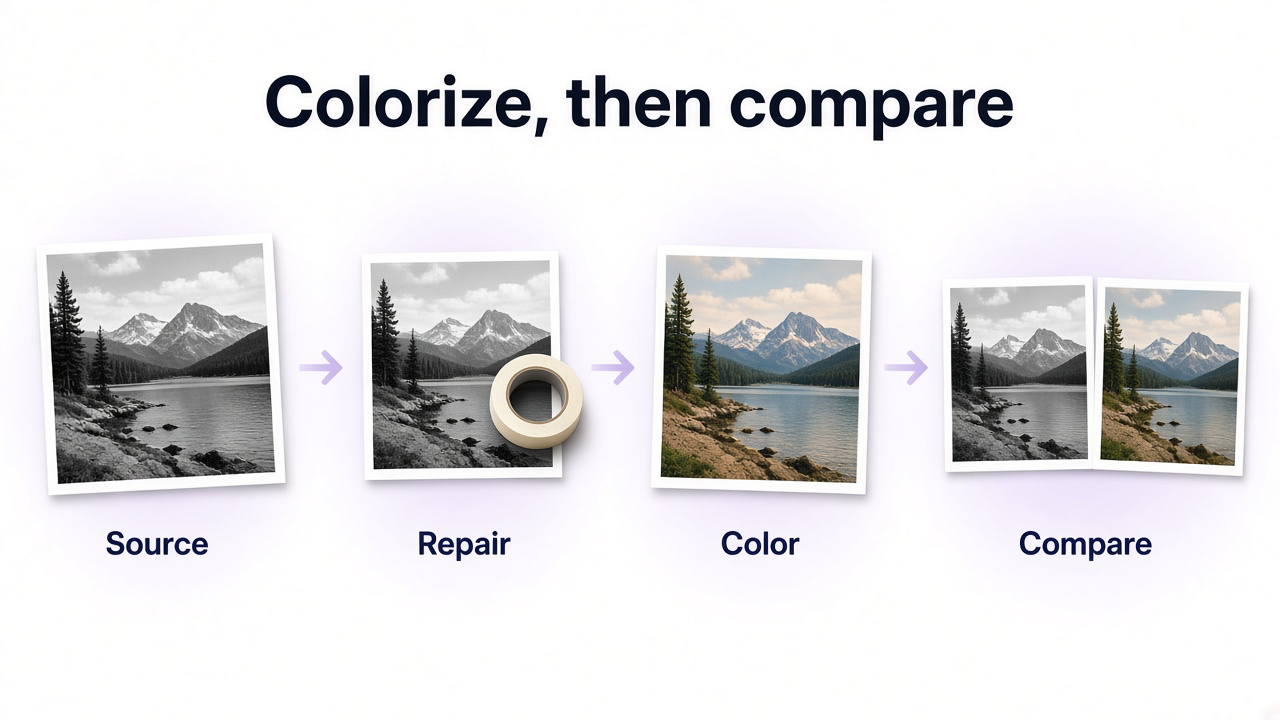
Upload the original photo
Use the cleanest and highest-quality scan or digital copy you have.
Restore major damage if necessary
Repair severe scratches, missing sections, or exposure problems that would interfere with interpretation.
Request restrained natural colorization
Preserve identity, clothing, objects, architecture, lighting, composition, and historical character.
Review the first result
Inspect skin, hair, clothing, sky, vegetation, buildings, vehicles, and object boundaries.
Correct specific colors where needed
If you know that a dress was blue or a vehicle was red, refine that item instead of regenerating the entire photograph.
Compare with the original
Make sure colorization has not altered faces, objects, clothing shapes, or other historical information.
Keep both files
Store the original black-and-white image separately from the colorized interpretation.
Prompt to colorize a black-and-white photo
Prompt when you know some of the original colors
Should you restore or colorize first?
If the photo is structurally damaged, restore the important damage first. If it is already clear and well preserved, colorization can usually be performed directly.
| Photo condition | Recommended starting point |
|---|---|
| Clear, well-preserved black-and-white photo | Colorize directly |
| Minor dust and small scratches | Either order can work; clean obvious distractions if necessary |
| Large tears or missing regions | Restore first |
| Severely faded or poorly exposed black-and-white scan | Improve tonal clarity before colorization |
| Originally color photo that has faded | Use color restoration rather than black-and-white colorization |
Common AI photo colorization mistakes
- Treating AI-generated colors as historically confirmed
- Oversaturating skin, grass, sky, or clothing
- Modernizing clothing or materials during colorization
- Changing facial identity while attempting to improve detail
- Using one uniform skin color across faces under different lighting
- Allowing color to bleed across object boundaries
- Ignoring known historical references
- Colorizing a faded color photo when it actually needs color restoration
- Discarding or overwriting the original black-and-white file
- Applying aggressive sharpening and restoration at the same time without reviewing what changed
How accurate is AI photo colorization?
Accuracy depends on what you mean by accurate.
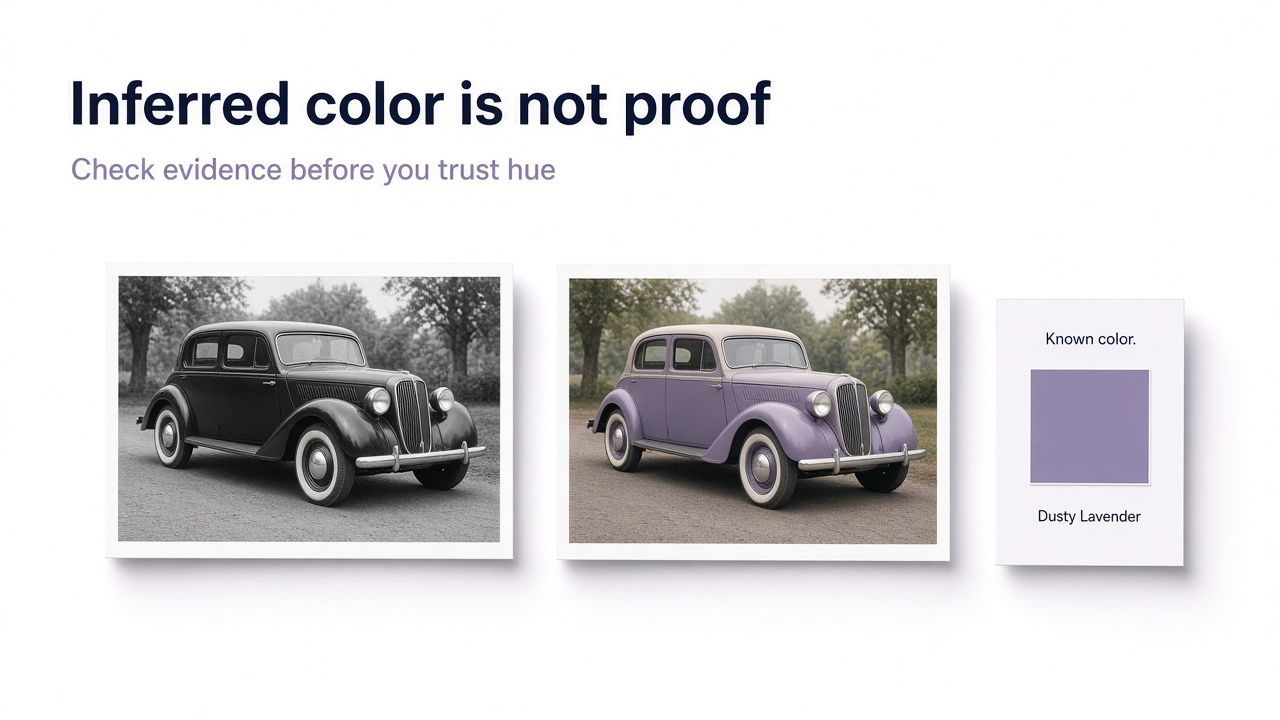
AI can often produce visually plausible colors because many objects have strong statistical patterns: vegetation is commonly green, clear skies are commonly blue, and human skin falls within constrained ranges. That can make an automatic result look immediately convincing.
But grayscale alone frequently does not uniquely determine hue. Several very different colors can produce similar brightness values in a black-and-white photograph. The system therefore has to infer.
For personal enjoyment, a plausible reconstruction may be exactly what you want. For archival or historical work, separate three things clearly: what is visible in the original, what is supported by external evidence, and what has been inferred by AI.
When you should label a photo as colorized
If a colorized image is being shared casually with family, the context may already be obvious. For historical publications, archives, genealogy collections, journalism, educational material, or public sharing where viewers could mistake the image for an original color photograph, identifying it as colorized is a useful transparency practice.
A simple caption such as "AI-assisted colorization of the original black-and-white photograph" is enough in many contexts.
The important point is not to diminish the colorized version. It is to preserve the distinction between the historical source and the later interpretation.
Black-and-white photo colorization checklist
Use the best available scan or source file
Repair major damage before colorizing when necessary
Keep the original black-and-white file unchanged
Preserve facial identity and age
Preserve clothing, objects, architecture, and composition
Keep skin tones restrained and consistent with the lighting
Research historically important colors when possible
Avoid excessive saturation
Check color boundaries at full size
Preserve old materials and photographic texture
Compare the final image with the original
Treat unverified colors as interpretations
Label historically shared images as colorized when appropriate
Frequently Asked Questions
Can AI colorize black-and-white photos?
Yes. AI can analyze the people, objects, materials, and environment in a black-and-white photograph and generate a plausible color interpretation while preserving the original scene.
Are AI colorized photos historically accurate?
Not automatically. AI can infer realistic-looking colors, but a grayscale photograph often does not contain enough information to determine exact original hues. Use historical references when accuracy matters.
Can GenImagePro colorize a black-and-white photo?
Yes. Upload the black-and-white photograph to GenImagePro and request natural colorization while specifying that the people, identity, clothing, objects, composition, and historical details should remain unchanged.
Should I restore an old photo before colorizing it?
Restore major damage first if scratches, tears, fading, missing areas, or severe exposure problems make the scene difficult to interpret. A clear, well-preserved photograph can usually be colorized directly.
Is colorizing a black-and-white photo the same as restoring color?
No. Colorization adds inferred color to an image that did not record color. Color restoration works with an originally color photograph whose existing colors have faded or shifted.
How can AI know the original clothing colors?
Usually it cannot know them with certainty from a black-and-white image alone. It may generate a plausible color based on visual context. If exact color matters, provide external references or specify known colors yourself.
Why does AI sometimes use the wrong colors?
Different colors can produce similar grayscale brightness, so the original hue may be ambiguous. The model has to infer a likely color from context, learned visual patterns, and any instructions you provide.
Can I tell AI the correct colors if I know them?
Yes. Specify the object and confirmed color clearly, such as 'the dress was dark blue' or 'the car was burgundy,' while asking the editor to preserve the rest of the photograph.
Should I keep the original black-and-white photo?
Yes. Keep the original as the historical source and save the colorized image separately. Do not overwrite the only copy of the original photograph.
Should I disclose that an old photo was colorized?
When the image is used in historical, archival, educational, journalistic, or public contexts where it could be mistaken for an original color photograph, labeling it as colorized is a good transparency practice.