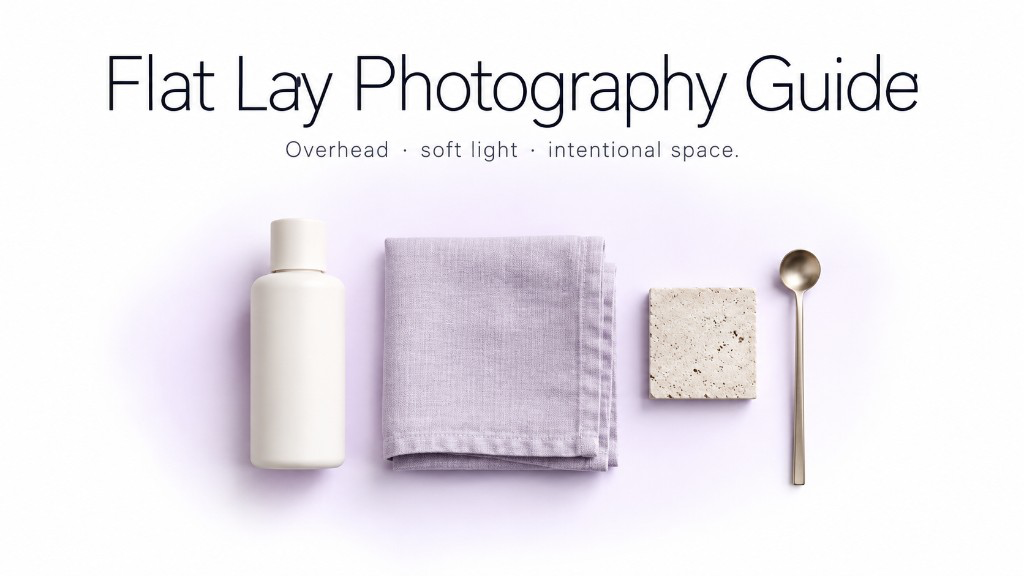
Flat lay photography looks simple, but strong flat lays are rarely random. The best images use careful spacing, controlled lighting, color balance, and intentional placement so the viewer immediately knows where to look. This makes flat lays especially useful for ecommerce, food, beauty, fashion accessories, stationery, jewelry, social media, and editorial product photography.
You can create flat lays traditionally with a camera or phone, or use GenImagePro to speed up the process once you already have a clean product image. Instead of physically building multiple scenes, you can upload the product and explore different flat-lay backgrounds, surfaces, styling directions, props, and campaign looks while preserving the product itself.
What Is Flat Lay Photography?
Flat lay photography is a style of photography where objects are arranged on a flat surface and photographed from directly above or very close to a 90-degree overhead angle. The result is a two-dimensional composition in which shape, spacing, color, texture, and arrangement become the main visual tools.
Because the camera sees the scene from above, depth is reduced compared with a traditional front-facing product photograph. That makes composition even more important. Every object has to earn its place in the frame.
Why Flat Lay Photography Works So Well
Common reasons brands use flat lays
- They make multiple objects easy to organize visually.You can show a collection, bundle, ingredients, accessories, or related products in a single frame.
- They work well for ecommerce and social media.The graphic overhead composition translates well to square, portrait, and feed-based formats.
- They give brands more control over styling.Backgrounds, props, shadows, and spacing can all reinforce a specific visual identity.
- They can explain a product quickly.Accessories, packaging, ingredients, or complementary items can be shown around the main object.
- They are relatively easy to reproduce.Once you define your lighting, camera height, and styling system, you can build a consistent series.
How to Take a Flat Lay Photo
Flat lay photography for beginners
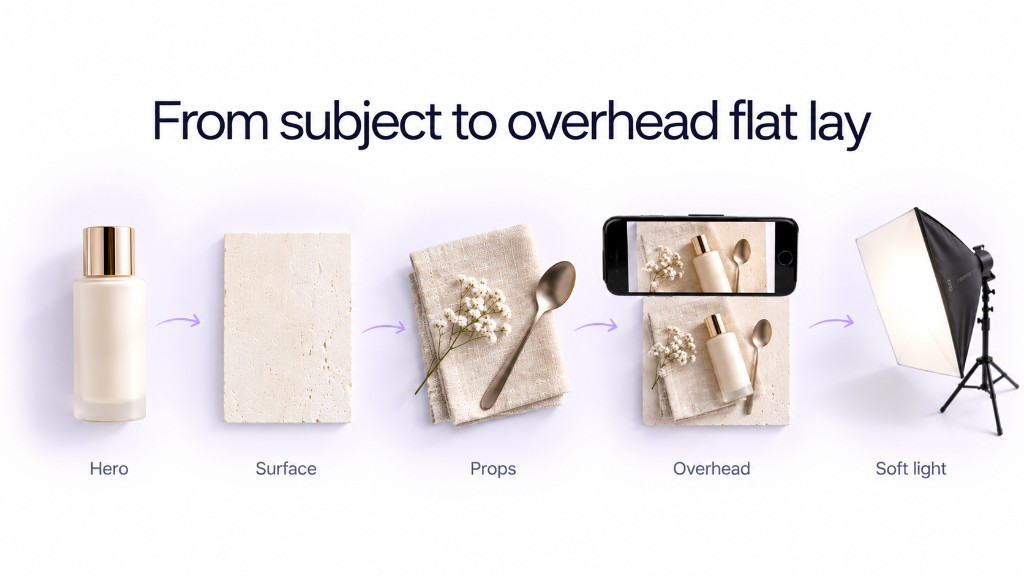
Choose one main subject
Decide what the viewer should notice first. This could be a product, plate of food, book, accessory, cosmetic, or collection.
Pick a simple background
Start with white, off-white, pale stone, wood, fabric, paper, or another surface that supports the subject instead of competing with it.
Arrange supporting objects
Add props only when they help tell the story, show scale, reinforce the product category, or improve the composition.
Position the camera overhead
Keep the camera sensor as parallel to the surface as possible so objects do not appear unintentionally distorted.
Use soft directional light
Window light or a large diffused source often works better than hard direct light for beginner flat lays.
Adjust spacing and balance
Move objects in small increments until the frame feels intentional rather than crowded or random.
Take several variations
Try alternate object positions, tighter crops, more negative space, and different prop combinations before dismantling the setup.
1. Choose the Right Background
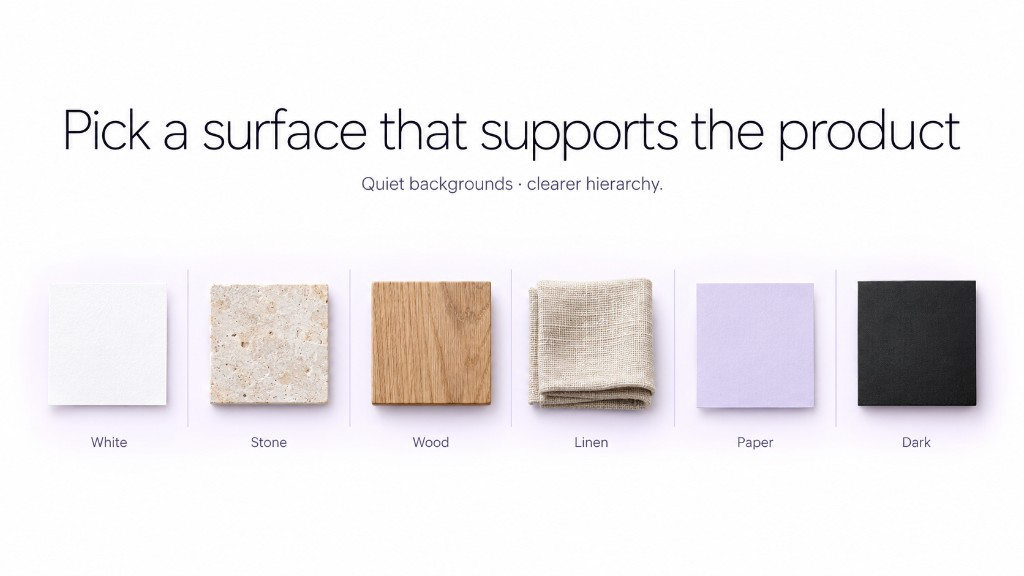
The background is one of the most important decisions because it covers most of the frame. Beginners often make the background too interesting, which forces the product to compete with textures, patterns, or strong color.
| Background | Best for | Effect |
|---|---|---|
| White or off-white | Beauty, ecommerce, stationery, food | Clean, bright, minimal |
| Light stone | Beauty, jewelry, food, homeware | Premium and editorial |
| Natural wood | Food, craft, lifestyle products | Organic and casual |
| Fabric or linen | Fashion, beauty, food | Soft and tactile |
| Colored paper | Campaigns, accessories, social content | Graphic and controlled |
| Dark matte surface | Luxury products, watches, premium packaging | Dramatic and high-contrast |
Start simple. A quiet surface usually makes hierarchy, spacing, and product detail easier to control.
2. Use Soft Directional Lighting
Flat lay photography still needs direction. Completely flat lighting can make every object feel pasted onto the surface, while extremely hard lighting can create distracting shadows that cut across the composition.
A large window beside the setup is one of the easiest lighting options for beginners. Position the scene close enough to receive soft directional light, then use a white card or reflector on the opposite side if the shadows become too deep.
3. Keep the Camera Parallel to the Surface
A classic flat lay is photographed almost exactly from above. If the camera tilts too much, objects closer to the camera become larger and the composition starts to feel more like a normal tabletop photograph than a flat lay.
A tripod with a horizontal arm is useful for frequent flat lay work, but beginners can also work handheld. Use the grid on your phone or camera, keep the device parallel to the surface, and leave extra space around the edges so you can correct the crop later.
4. Build a Clear Visual Hierarchy
The main product should remain the first thing the viewer notices. Supporting objects should guide attention toward it rather than compete with it.
Ways to create hierarchy
Make the main object larger or more central.
Give the hero product more negative space.
Use smaller supporting props around it.
Use contrast to separate the main subject from the background.
Avoid several equally dominant objects unless the entire collection is the subject.
5. Use Negative Space
One of the most common beginner mistakes is filling every empty part of the frame. Negative space gives objects room to breathe and makes the image easier to understand.
Negative space is especially important when the image will later contain copy, a price, a campaign headline, or a call to action. If you know where text will appear, build that empty area intentionally during the shoot.
6. Use Props with a Purpose
Props should help explain the main subject, create context, or support the color palette. Adding decorative objects simply because the frame feels empty usually makes the photograph weaker.
| Category | Useful props | Avoid |
|---|---|---|
| Skincare | Ingredient cues, stone, linen, applicators | Too many flowers or unrelated cosmetics |
| Jewelry | Small stone forms, fabric, trays | Busy reflective surfaces |
| Food | Ingredients, cutlery, napkins, small serving pieces | Props that hide the dish |
| Stationery | Pens, clips, paper, desk accessories | Too many small scattered objects |
| Fashion accessories | Fabric, eyewear, small complementary accessories | Unrelated products competing for attention |
Add props only when they explain the product, show scale, or reinforce the palette.
7. Think About Color Before You Shoot
A controlled palette makes a flat lay look more intentional. You do not need every object to be the same color, but the colors should feel related.
- MonochromaticUse several shades from one color family.
- NeutralWhite, stone, gray, black, beige, or muted natural materials.
- ComplementaryUse controlled opposing colors for stronger contrast.
- Brand-ledBuild the background and props around the product or brand palette.
8. Try Different Flat Lay Compositions
| Style | How it works | Good for |
|---|---|---|
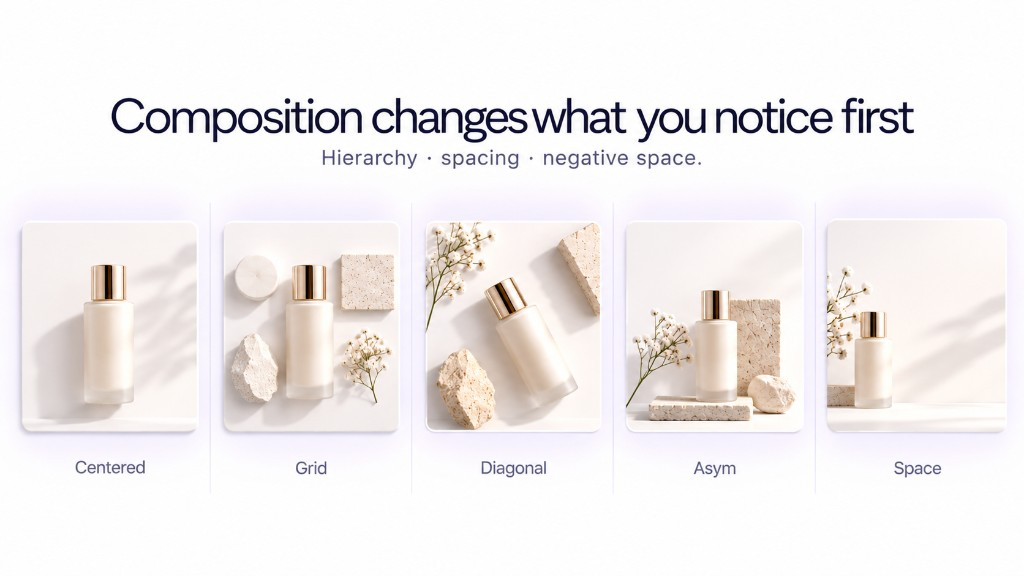
| Centered | Hero product sits near the middle | Simple ecommerce and product ads |
| Grid | Objects follow clean rows and spacing | Collections, stationery, accessories |
| Diagonal | Objects create movement across the frame | Fashion, beauty, campaign imagery |
| Asymmetrical | Visual weight is balanced without mirroring | Editorial and lifestyle imagery |
| Organized chaos | Objects feel casual but remain deliberately placed | Food, lifestyle, creative campaigns |
| Negative-space composition | Objects occupy one area of the frame | Ads, social graphics, text overlays |
Pick a layout that matches the job — ecommerce clarity, collection grids, or campaign negative space.
How to Create Flat Lay Product Photography with GenImagePro
You do not always need to build every flat lay physically. If you already have a clear photo of your product, GenImagePro can help you explore professional flat-lay scenes with different surfaces, styling, props, layouts, and lighting directions.
Upload the real product image to GenImagePro and describe the scene you want. GenImagePro is designed to use strong current image-generation and image-editing technology for the requested visual task, so you can focus on the creative direction instead of choosing separate models, background tools, compositing software, or technical workflows.
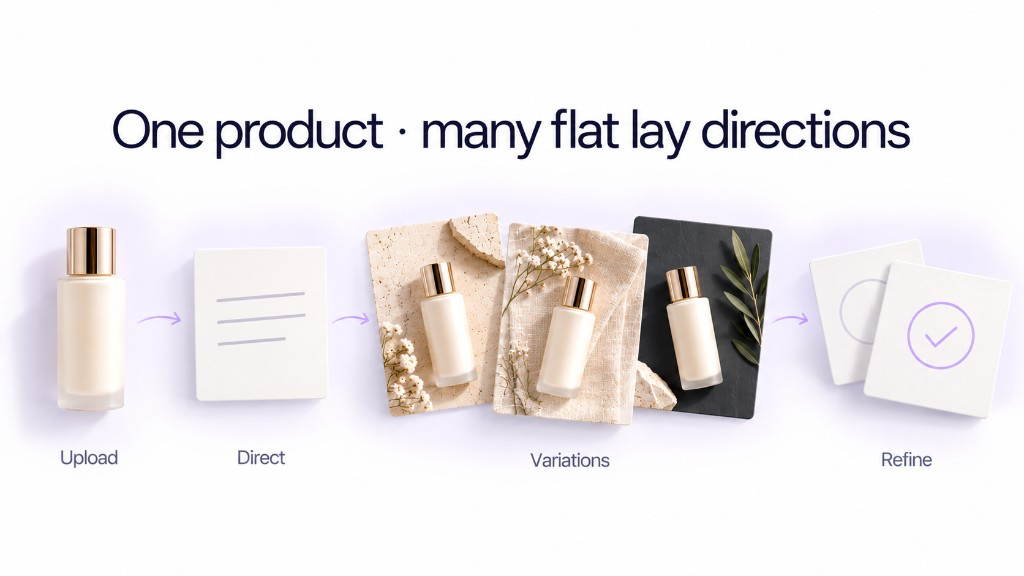
AI flat lay workflow in GenImagePro
Upload your product
Use a clear source image where the product shape, material, packaging, colors, and details are visible.
Choose the flat lay direction
Describe the surface, lighting, composition, props, and visual style you want, or begin from a relevant GenImagePro template.
Preserve the actual product
Tell GenImagePro to keep the product shape, label, packaging, color, materials, and proportions unchanged.
Generate several variations
Explore different compositions or campaign directions without rebuilding the scene from scratch.
Refine the strongest result
Adjust the background, amount of negative space, prop density, lighting, or composition with another instruction.
Flat Lay Product Photography Prompt for GenImagePro
Flat Lay Photography Ideas by Product Type
Beauty and Skincare Flat Lay
Jewelry Flat Lay
Fashion Accessories Flat Lay
Food Flat Lay
Stationery Flat Lay
Common Flat Lay Photography Mistakes
What to avoid
- Too many propsExtra objects make it harder to understand what the image is actually about.
- No clear hero subjectIf every object has equal visual weight, the composition can feel confusing.
- Camera not directly overheadUnintended perspective can distort objects and make the layout feel uneven.
- Harsh uncontrolled shadowsStrong shadows can cut across objects and distract from product details.
- Busy background textureThe surface should support the products rather than becoming the focal point.
- Objects too close to the frame edgeLeave room for cropping into different social, advertising, or ecommerce ratios.
- Random spacingSmall differences in spacing are very visible from an overhead viewpoint.
- Too much AI-generated decorationWhen creating flat lays with AI, keep props restrained and protect the fidelity of the real product.
Flat Lay Photography with a Phone
You do not need a professional camera to start. Modern phones are more than capable of producing good flat lays when the lighting and composition are controlled.
Phone flat lay checklist
Clean the camera lens before shooting.
Use the main camera instead of digital zoom.
Turn on the camera grid.
Keep the phone parallel to the surface.
Use natural window light when possible.
Tap the hero product to set focus.
Leave extra space for cropping.
Take several small composition variations.
Traditional Flat Lay vs AI Flat Lay Creation
| Need | Traditional shoot | GenImagePro |
|---|---|---|
| Exact physical reality | Best when every physical detail must be photographed directly | Useful for creative variations based on the real product image |
| Many styling directions | Requires rearranging or rebuilding scenes | Generate and compare multiple directions faster |
| Different backgrounds | Requires surfaces or physical sets | Explore different environments from one product source |
| Campaign testing | Each variation can require additional shooting | Create variations for different campaign concepts |
| Product fidelity | Captured directly by the camera | Use the real uploaded product and explicitly preserve its design |
Shoot once for product truth, then use GenImagePro to explore more flat-lay directions from that source.
The two approaches do not have to compete. A practical workflow is to shoot one clean, accurate product photograph, then use GenImagePro to explore additional flat-lay compositions, backgrounds, campaign directions, and visual styles from that source.
Frequently Asked Questions
What is flat lay photography?
Flat lay photography is an overhead photography style where objects are arranged on a flat surface and photographed from directly above or close to a 90-degree angle.
Can I take flat lay photos with my phone?
Yes. Good lighting, a clean background, careful composition, and keeping the phone parallel to the surface matter more than owning an expensive camera.
What is the best lighting for flat lay photography?
Soft directional light is a strong starting point. Window light or a large diffused artificial light can create gentle shadows and useful texture without overwhelming the composition.
What background should I use for flat lay photography?
White, off-white, stone, paper, fabric, wood, and other simple surfaces work well. Choose a background that separates the subject clearly without competing with it.
Can I create flat lay photography with GenImagePro?
Yes. Upload your real product photo to GenImagePro and ask for an overhead flat-lay scene. You can specify the background, lighting, composition, props, color palette, and amount of negative space while asking the model to preserve the actual product.
Do I need to choose which AI model to use for a flat lay?
No. GenImagePro is designed around the visual result you request. You can upload the image, describe the flat-lay direction you want, and let the platform handle the underlying image-generation and editing workflow.
Can GenImagePro keep my product unchanged?
For the strongest fidelity, upload a clear source photo and explicitly tell GenImagePro to preserve the product's shape, packaging, colors, materials, labels, branding, and proportions. Always inspect commercially important details before publishing.
How many props should I use in a flat lay?
There is no fixed number, but beginners usually benefit from using fewer props. Every supporting object should add context, balance, scale, or visual direction.
Why does my flat lay look messy?
The usual causes are too many objects, inconsistent spacing, competing colors, a busy background, or no obvious hero subject. Remove items before adding more.