A clothing catalog can contain hundreds of individually good photographs and still look inconsistent.
One model is framed closer than another. A white shirt looks cool in one image and yellow in the next. Dresses sit at different heights in the frame. Some products have hard shadows while others have almost none. A black garment fills 80% of its product card while the next occupies half of it.
These are not primarily editing problems. They are production-system problems.
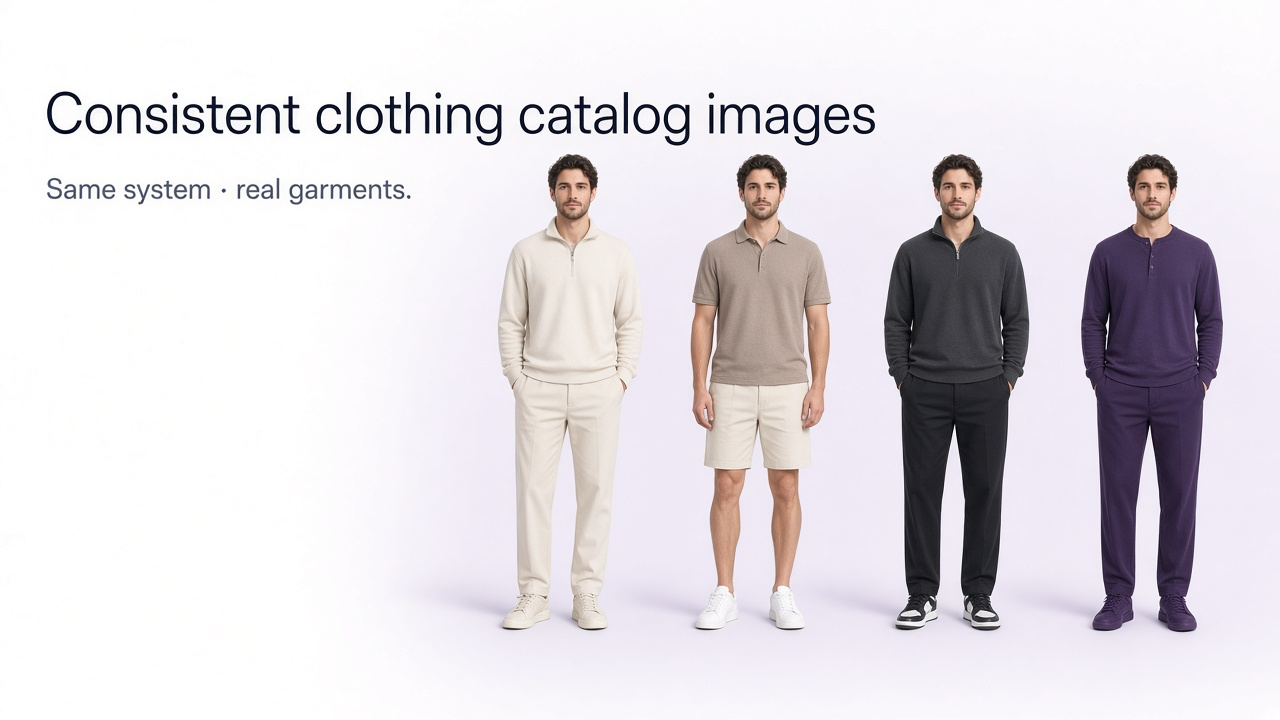
The goal of catalog consistency is not to make every garment look identical. It is to make the photographic presentation predictable enough that shoppers can compare the products themselves instead of noticing changes in photography.
What a consistent clothing catalog means
Consistency means keeping the photographic variables stable while allowing the real garment differences to remain visible.
| Keep consistent | Allow to remain different |
|---|---|
| Background | Garment color |
| Lighting direction | Fabric texture |
| Camera height | Garment length |
| Focal-length approach | Silhouette |
| Model starting position | Actual fit |
| Primary crop | Product proportions |
| Image sequence | Construction details |
| Editing treatment | Material and finish |
Set the studio before the first SKU
Write the photography spec
The easiest way to create inconsistent images is to rely on memory.
Write a simple photography specification that another photographer, stylist, retoucher, or future version of your team could reproduce.
| Variable | Example rule |
|---|---|
| Background | Neutral seamless light gray |
| Hero framing | Full garment or full body centered with consistent margin |
| Camera | Fixed tripod position and height |
| Lens | Same focal length for comparable garment categories |
| Lighting | Large soft key camera-left with fixed fill |
| White balance | Fixed for the controlled lighting setup |
| Primary pose | Neutral front pose, arms positioned away from silhouette |
| Output | Standard catalog aspect ratio and export dimensions |
Current ecommerce photography guidance from large platforms makes the same point: define resolution, backgrounds, lighting, shot types, and image dimensions before you try to manage a large catalog.
Lock the camera position
A tripod is not only for sharp photographs. In catalog production, it is a measurement tool.
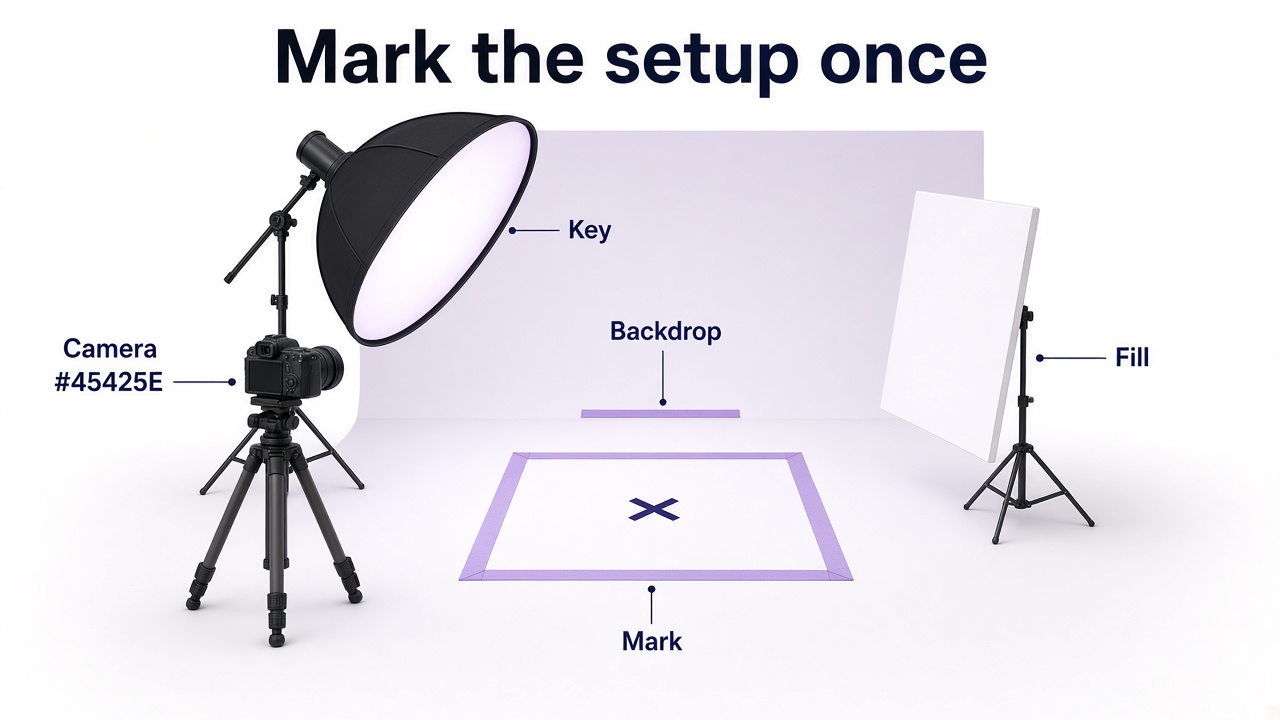
Once you have found the correct camera height, distance, angle, and orientation, mark them. If the tripod moves during lunch and returns thirty centimeters closer, the next batch may have a noticeably different perspective.
Mark the physical setup
Tripod-leg positions on the floor
Camera height
Focal length
Camera orientation
Model or mannequin standing mark
Background position
Key-light and fill-light positions
A fixed tripod is what keeps the angle the same across repeated product photography.
Keep perspective consistent
Consistency is not only about placing the model in the same number of pixels.
Moving the camera closer and using a wider focal length can change the apparent relationship between the upper and lower body. Moving farther away with a longer focal length changes perspective again.
For comparable catalog images, use the same camera position and focal-length strategy rather than constantly zooming, moving, and cropping until each garment appears roughly similar.
Keep lighting fixed across the batch
Lighting consistency is difficult to repair perfectly after the shoot because lighting affects shape, texture, shadow, highlight, and apparent color simultaneously.
For a catalog session, lock the key light, fill, reflector, and background lighting once the setup is approved. Mark their positions just as you mark the camera.
A large soft source is common because it creates predictable light across different garments, but the exact setup matters less than repeatability.
Lock exposure and white balance
Automatic camera decisions can introduce small inconsistencies every time the garment color changes.
A large white dress may cause an automatic exposure system to react differently from a black jacket. Automatic white balance may also shift slightly between frames.
When the studio lighting is fixed, use repeatable exposure and white-balance settings rather than allowing the camera to reinterpret every SKU independently.
Pose and prepare every garment the same way
Standardize the starting position
If models appear throughout the catalog, establish a neutral starting pose that can be reproduced.
The exact pose depends on the brand, but it should reveal the garment rather than obscure it.
A useful ecommerce starting pose
Feet positioned consistently
Weight distributed naturally
Shoulders aligned unless the brand specifies otherwise
Arms positioned so the garment silhouette remains visible
Sleeves shown at their actual length in at least one image
Hands do not hide waistbands, pockets, closures, logos, or construction
Baymard's apparel testing found that model imagery helps shoppers understand scale, length, proportion, drape, and fit, but also observed that styling choices can hide important information. Consistency should therefore include what the pose reveals, not only where the model stands.
Do not force different models into the same body shape
If the catalog uses multiple models, consistency does not require making their bodies appear identical.
Keep camera height, lighting, crop logic, pose direction, and product presentation consistent while allowing real differences in height and body proportions to remain visible.
If model height, measurements, or worn garment size are useful to the shopper, present that information directly rather than manipulating the imagery to create a false sense that every garment sits on the same body.
Prepare every garment the same way
A repeatable studio setup cannot compensate for inconsistent garment preparation.
Steam garments and remove lint, loose fibers, and visible defects before shooting, then repeat that prep for every SKU.
Repeat for every SKU
Steam or press
Lint-roll
Check loose threads
Arrange collars and cuffs
Close or open buttons consistently according to the style guide
Position belts, straps, drawstrings, and hoods consistently
Check styling again after movement
Standardize shots, crops, and backgrounds
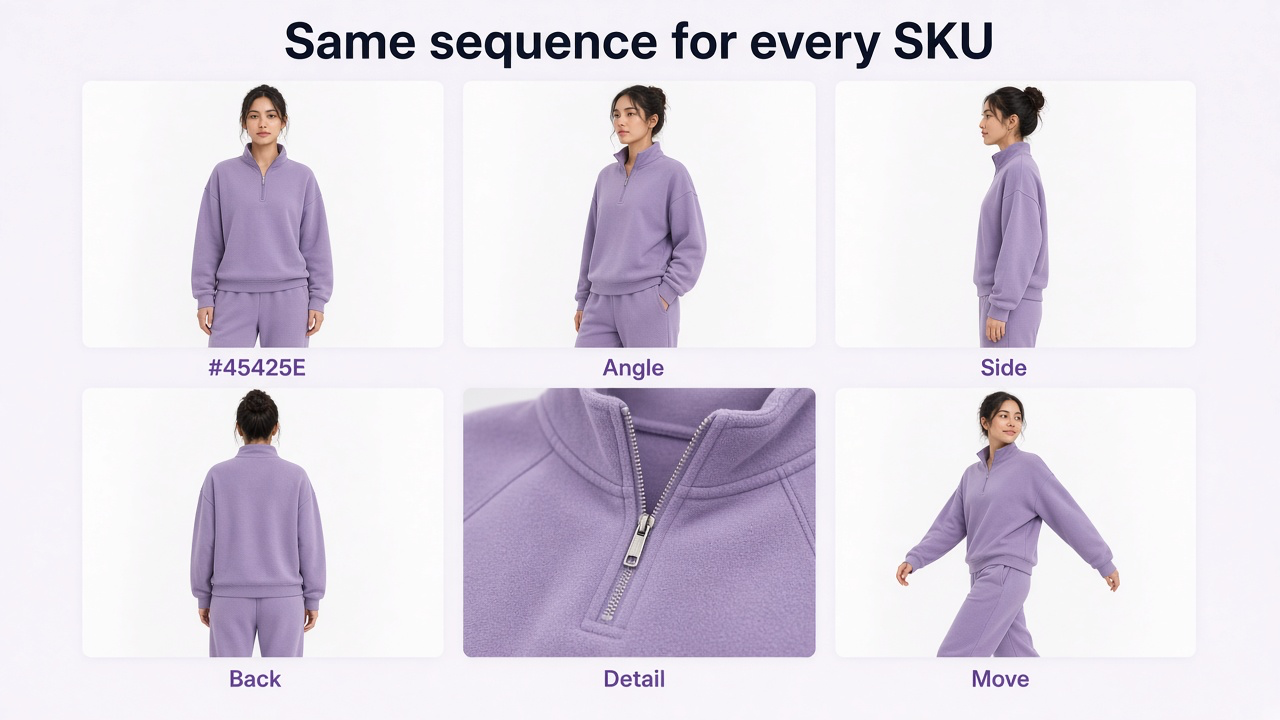
Use one shot sequence
Consistency becomes much easier when every applicable SKU follows the same shot order.
Front hero
Clean neutral view showing the overall garment and fit.
Three-quarter
Adds shape while keeping the clothing easy to evaluate.
Side
Useful for garment depth, volume, fit, and construction.
Back
Shows closures, seams, shape, or back design where relevant.
Detail
Fabric, knit, stitching, print, buttons, zipper, embroidery, or another important feature.
Natural movement
Shows fabric behavior and drape when the garment benefits from it.
Optional lifestyle
Adds context after the core product information has been captured.
Not every garment needs every frame. What matters is that comparable items follow comparable rules.
For a fuller clothing shoot, see Clothing Photography for Ecommerce and Fashion Photography Guide.
Set crop rules by garment category
Using exactly the same crop for a cropped top and a floor-length dress can produce awkward results.
Instead, define crop families.
| Category | Possible rule |
|---|---|
| Tops | Consistent upper-body or full-model presentation with fixed top margin |
| Trousers | Full leg visible with consistent floor relationship |
| Dresses | Full length visible with consistent head and floor margins |
| Outerwear | Enough surrounding space to preserve silhouette and volume |
| Accessories | Separate catalog specification based on object scale |
The goal is consistency among comparable products rather than mathematically identical crops across unrelated categories.
Standardize how large the garment appears
When one product fills most of the card and another appears tiny, the category page loses visual rhythm and products become harder to compare.
Use consistent image proportions across the catalog, and keep the product large enough to read in shopping placements.
For your own store, define internal crop guides rather than manually eyeballing every export.
Keep the background truly consistent
A white background is not automatically consistent. One can be blue-white, another warm ivory, and another slightly gray.
Decide whether the catalog background is pure white, off-white, light gray, or another controlled tone, then match it intentionally during capture or post-production.
If images come from several shoots or suppliers, background standardization can be one of the most useful post-production steps because it reduces obvious differences between sources.
Keep color and variants accurate
Treat color as a product requirement
A consistent catalog should have a coherent color treatment, but that does not mean forcing every garment toward the same palette.
A navy product should remain navy. A cream garment should not become bright white because the rest of the catalog uses a white backdrop. A muted green variant should not be pushed toward a more aesthetically convenient olive.
Google's current Merchant Center guidance puts the same rule in feed language: variant imagery should accurately represent the exact color, pattern, finish, and material of the SKU being sold.
Color-consistency workflow
Use stable lighting and white balance
Capture a color reference when accuracy is especially important
Perform global calibration before subjective styling
Compare color variants side by side
Check that PDP imagery matches the named variant
Avoid aggressive grading on catalog hero images
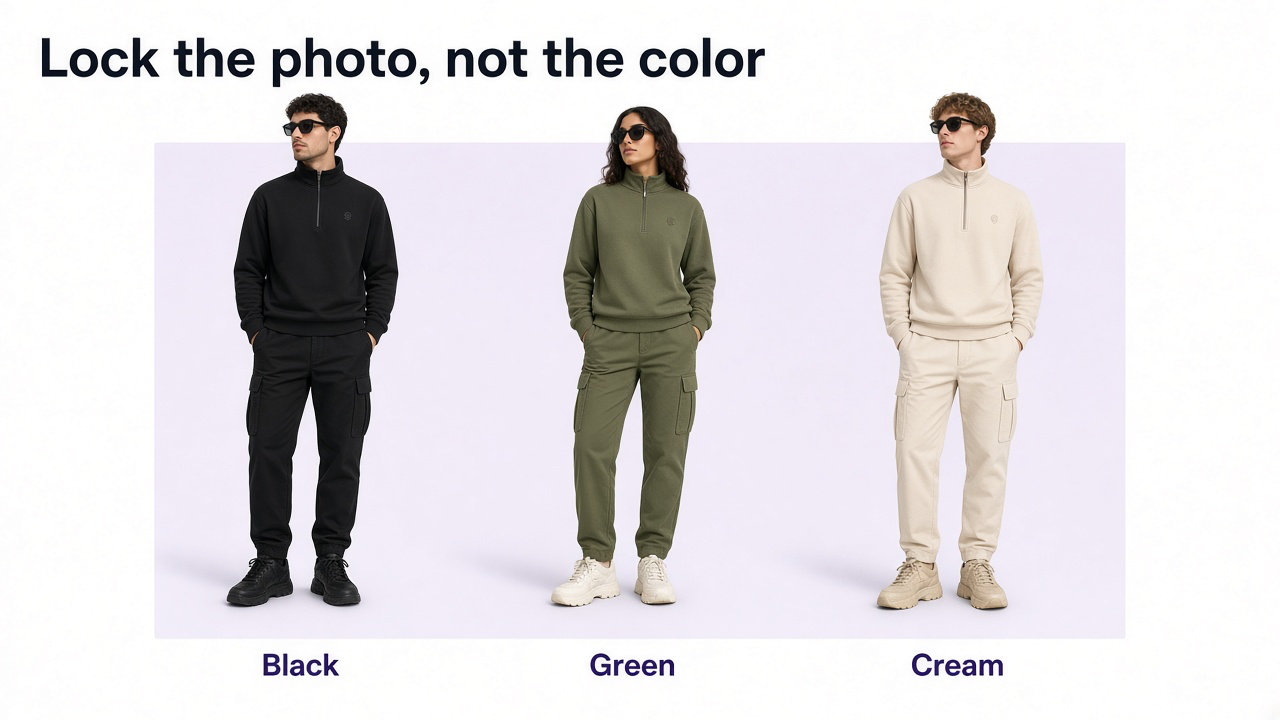
Check every variant separately
Do not approve the black hero and assume the red, cream, striped, and leather variants are automatically correct.
Visually different variants need their own imagery when color, pattern, finish, or material changes.
This is particularly important when a material change affects how the garment reflects light. Black cotton, black satin, and black leather may share a color name while requiring noticeably different visual treatment to represent their surfaces accurately.
Edit, name, and review the set
Batch the repeated corrections
Once the capture process is controlled, many post-production adjustments should also be repeatable.
Apply shared corrections for exposure baseline, white balance, background treatment, crop, dimensions, export profile, and file format where appropriate. Then handle product-specific corrections separately.
Name files so they stay attached to the SKU
Large catalog projects become inconsistent when files lose their relationship to products and shot types.
Use one naming convention and keep the originals organized when a catalog runs to hundreds or thousands of images.
| File | Meaning |
|---|---|
| SKU123-black-front | Black variant, front hero |
| SKU123-black-back | Black variant, back view |
| SKU123-black-detail-01 | Black variant, first detail image |
| SKU123-green-front | Green variant, front hero |
The exact syntax matters less than having one system that connects each asset to the right SKU, variant, shot type, and version.
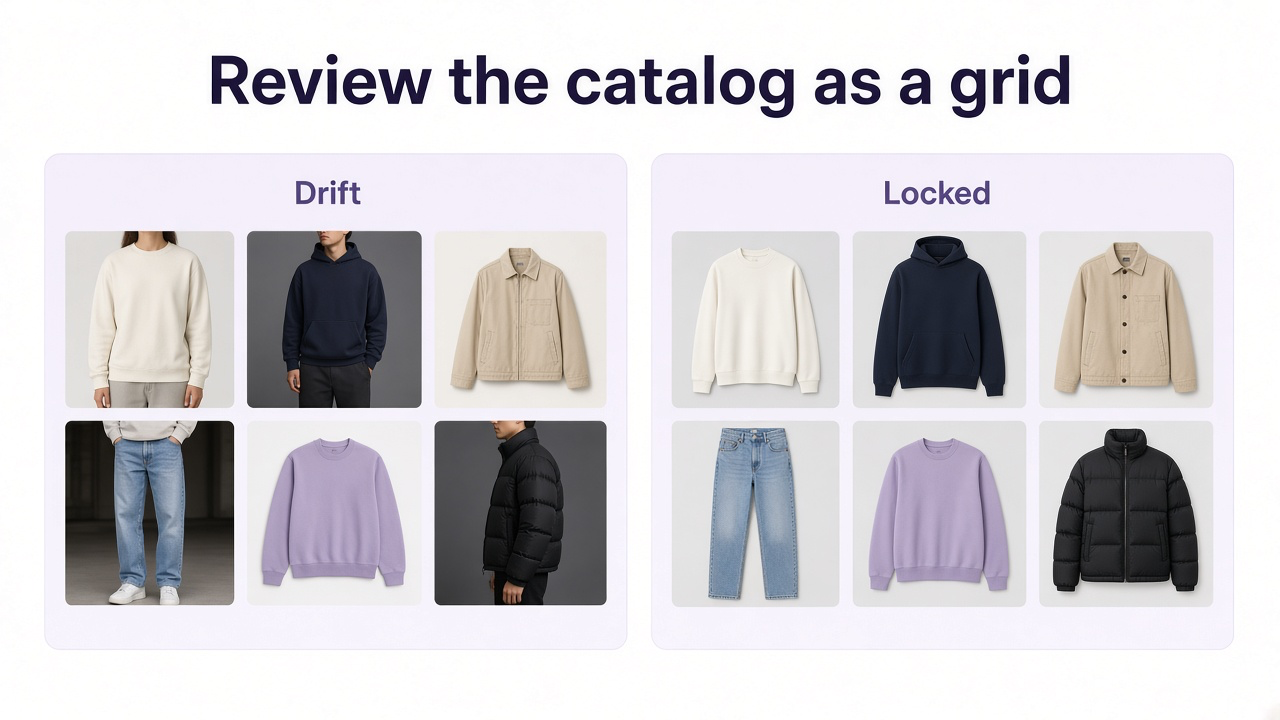
Review the catalog as a grid
A catalog consistency problem may be almost invisible when reviewing one image at full size.
Place twenty or thirty heroes beside one another and problems become obvious: one model is larger, one background is warmer, one crop sits too high, or one product carries a stronger shadow.
Grid-level QA
Model or garment scale feels coherent
Heads and feet align according to the category rule
Background tones match
Contrast does not jump between products
Color treatment feels coherent without changing SKU colors
Shadow intensity and direction are related
No individual product appears accidentally zoomed in or distant
Keep PDP, category, and feed uses separate
One master catalog image may feed several placements, but each placement can apply a different crop or size.
The same product image may appear large on the product page, smaller in a listing, and as a thumbnail. Consistent source proportions and enough resolution are what make those crops possible.
Apparel shopping feeds generally want high-quality imagery, clothing shown on models where that helps, complete framing for full-body images, and enough pixels for the placement.
For detailed cross-channel preparation, see How to Prepare Product Images for Multiple Marketplaces.
Extend the catalog with GenImagePro
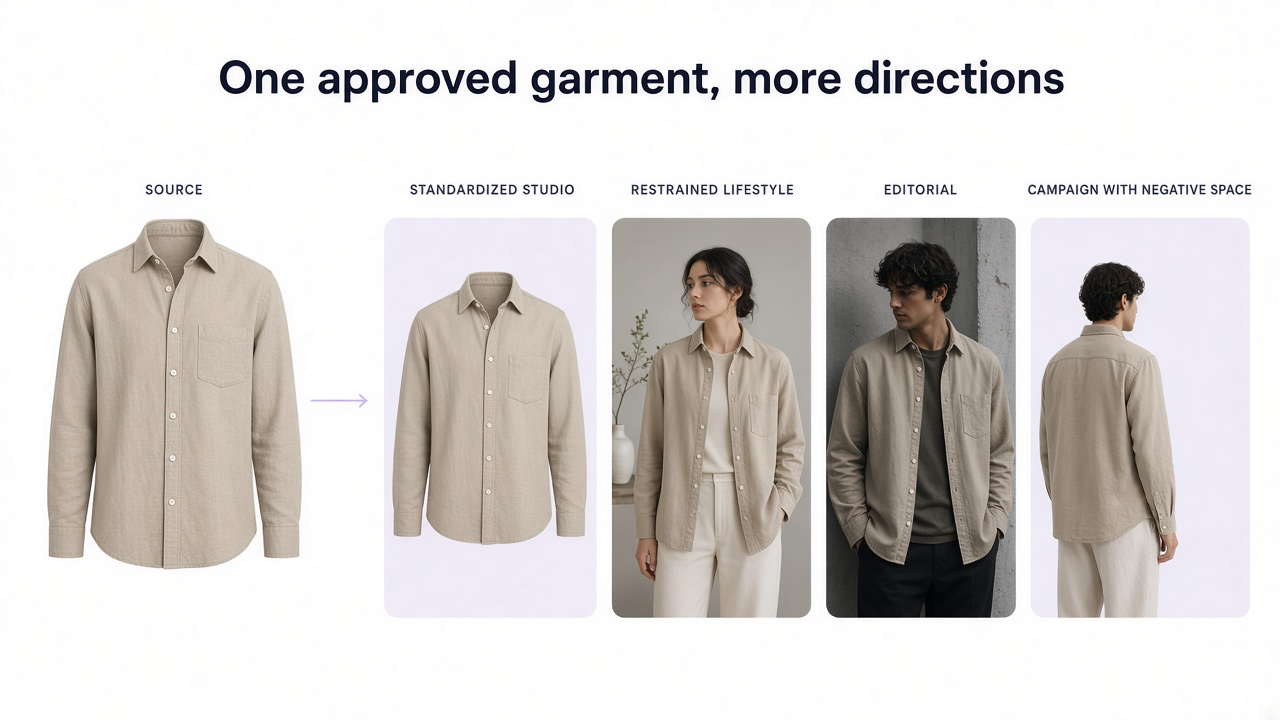
Start from an approved garment
The strongest GenImagePro workflow begins with approved garment references rather than asking AI to recreate a SKU from a text description.
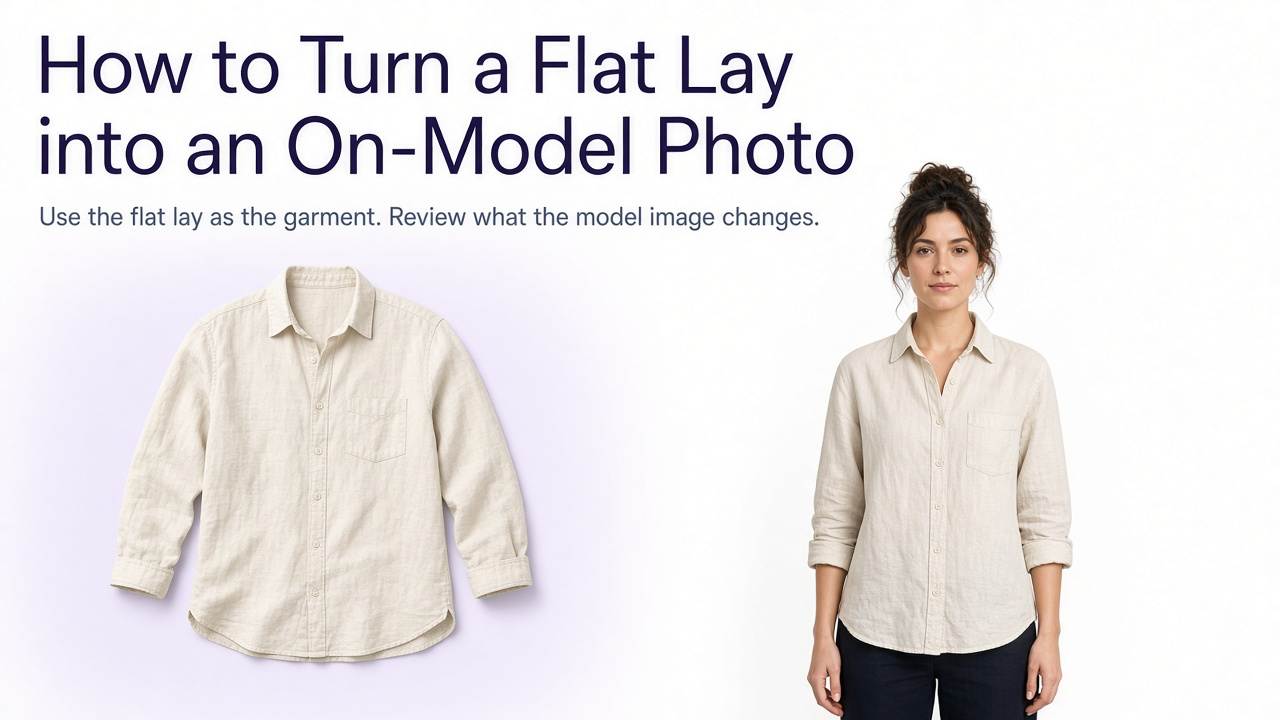
Upload the real garment or existing catalog image and use it as the visual anchor. GenImagePro can then help create cleaner studio presentation, another commercial environment, a lifestyle direction, an editorial image, or a campaign composition while preserving the clothing itself.
This can be especially useful when a brand has accurate product assets but needs more visual directions than were captured during the original shoot.
| Existing issue or need | Useful direction |
|---|---|
| Backgrounds from several sources do not match | Create a standardized clean presentation while preserving the garment |
| Only basic studio assets exist | Create additional lifestyle or editorial imagery |
| Campaign needs more compositions | Create wider or vertical commercial directions |
| Seasonal creative is missing | Create seasonal environments around the approved garment |
| Need more catalog-consistent product presentation | Use the approved source with fixed background, lighting, crop, and composition instructions |
Keep one catalog prompt
If you are processing related catalog images, keep the recurring visual rules stable instead of rewriting the art direction for every SKU.
Separate fixed rules from the SKU
Consistency becomes easier when the catalog style and the garment identity are treated as separate inputs.
| Fixed | SKU-specific |
|---|---|
| Background | Garment color |
| Lighting | Pattern |
| Framing | Fabric |
| Camera perspective | Construction |
| Model presentation | Actual fit |
| Shadow treatment | Garment dimensions |
This is the same principle described in How to Get Consistent AI Image Results: control what is allowed to change instead of trying to remove variation completely.
Do not fake garment fit
A perfectly aligned category grid is not worth creating if the process changes the clothing itself.
Do not digitally lengthen dresses to make hems align, tighten garments so every silhouette has the same width, change sleeve lengths, or reshape models simply to make the catalog grid look cleaner.
If exact fit is an important buying question, preserve truthful real fit references and provide size and model information separately.
Make channel crops from the master
Once each SKU has an approved master image, create channel-specific variations from that approved source rather than repeatedly starting from different files.
A master can feed square category imagery, vertical shopping placements, wider campaign frames, social crops, and additional GenImagePro directions while keeping the garment identity anchored to one approved reference.
Clothing catalog checklist
Camera, light, background, and pose are fixed for the batch
Comparable garments share crop and scale rules
Each variant still shows its real color, fabric, and construction
The category grid was reviewed together, not one hero at a time
AI images were checked against the approved garment
Frequently Asked Questions
How do I make clothing product photos consistent?
Standardize the photography before shooting: use fixed camera and lighting positions, a repeatable model pose, documented crop rules, consistent white balance, the same background system, and a defined shot sequence. Then use repeatable post-production and review the complete catalog as a grid.
Should every clothing catalog image have exactly the same crop?
Not necessarily. Comparable garments should follow the same crop rules, but a cropped top and a floor-length dress may need different crop families. The goal is coherent presentation without hiding real product proportions.
How do I keep garment size consistent in product images?
Use a fixed camera position, model or mannequin mark, focal length, and crop guide. Review category images together to catch products that appear accidentally too large or too small.
How do I keep clothing color consistent across a catalog?
Use controlled lighting, fixed or measured white balance, repeatable exposure, and a consistent color-management workflow. Compare variants against approved product references instead of applying aggressive creative grading to every SKU.
Should clothing variants have their own images?
Visually different variants should be represented accurately. Dedicated imagery should show the exact color, pattern, finish, and material of each variant.
Should I use the same model for the entire clothing catalog?
Not necessarily. Multiple models can be used while preserving a consistent photographic system. Keep camera position, lighting, crop logic, pose direction, and styling standards stable without digitally forcing different models to look identical.
How many images should each clothing product have?
There is no universal number. Use enough images to explain the garment. A typical useful sequence may include front, three-quarter, side, back, material or feature detail, movement, and optional lifestyle imagery when those views add information.
Can GenImagePro make clothing catalog images more consistent?
GenImagePro can use approved garment images as references for additional standardized studio presentation or other visual directions. Preserve the exact garment and keep recurring background, lighting, crop, model presentation, and photographic instructions stable across the set.
Can I use GenImagePro to create lifestyle images from catalog photos?
Yes. Once you have an accurate garment source, you can create additional lifestyle, editorial, seasonal, and campaign directions while keeping the real garment as the visual reference.
Should AI-generated catalog images be used to show exact fit?
Do not assume a generated image proves exact garment fit. When fit is important to the purchase, keep accurate real fit photography, garment measurements, sizing information, and relevant model information available.
How should I QA a large clothing catalog?
Review both individual images and the full category grid. Check framing, product scale, background, lighting, white balance, color accuracy, shot order, variant mapping, and whether any retouching or AI editing has changed the garment.