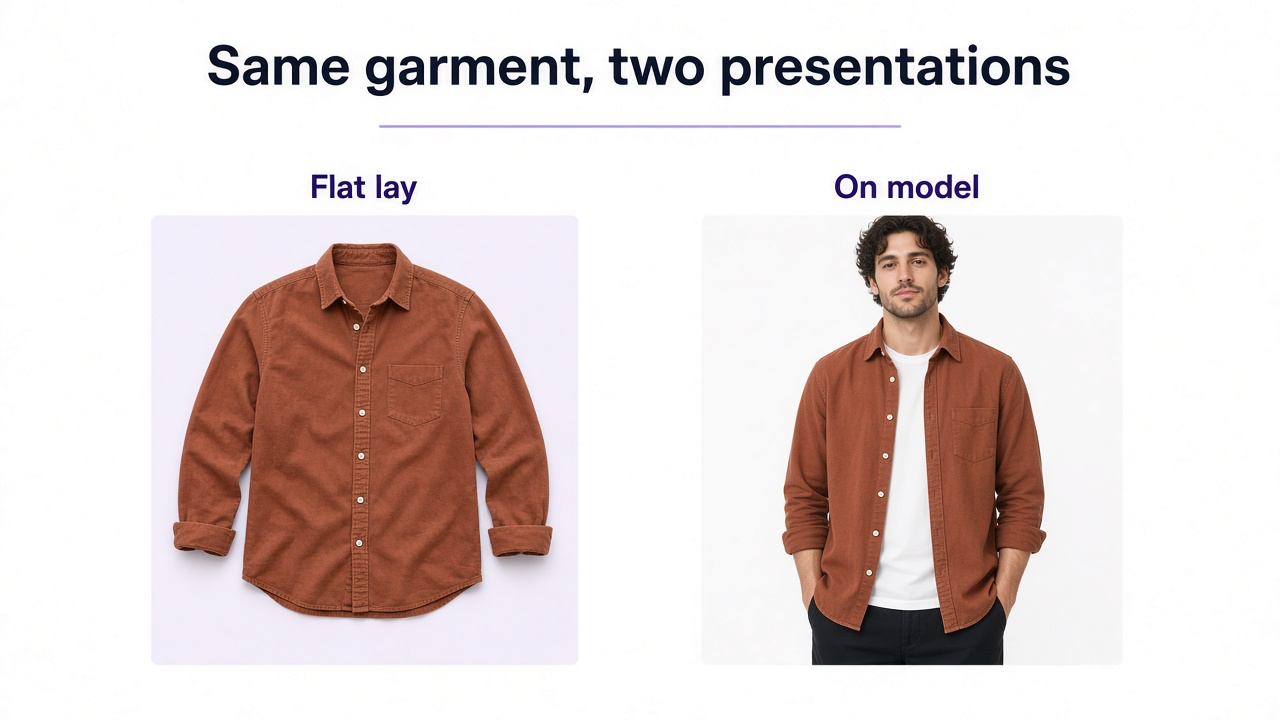
Flat lays are one of the easiest ways to photograph clothing. You can place a garment on a clean surface, shoot it from directly above, and capture its color, pattern, shape, and construction without hiring a model or building a full studio.
Their limitation is equally obvious: clothing is designed to be worn. A shirt lying on a table cannot fully show how it hangs from the shoulders, where its hem falls on a body, or how the fabric behaves when worn.
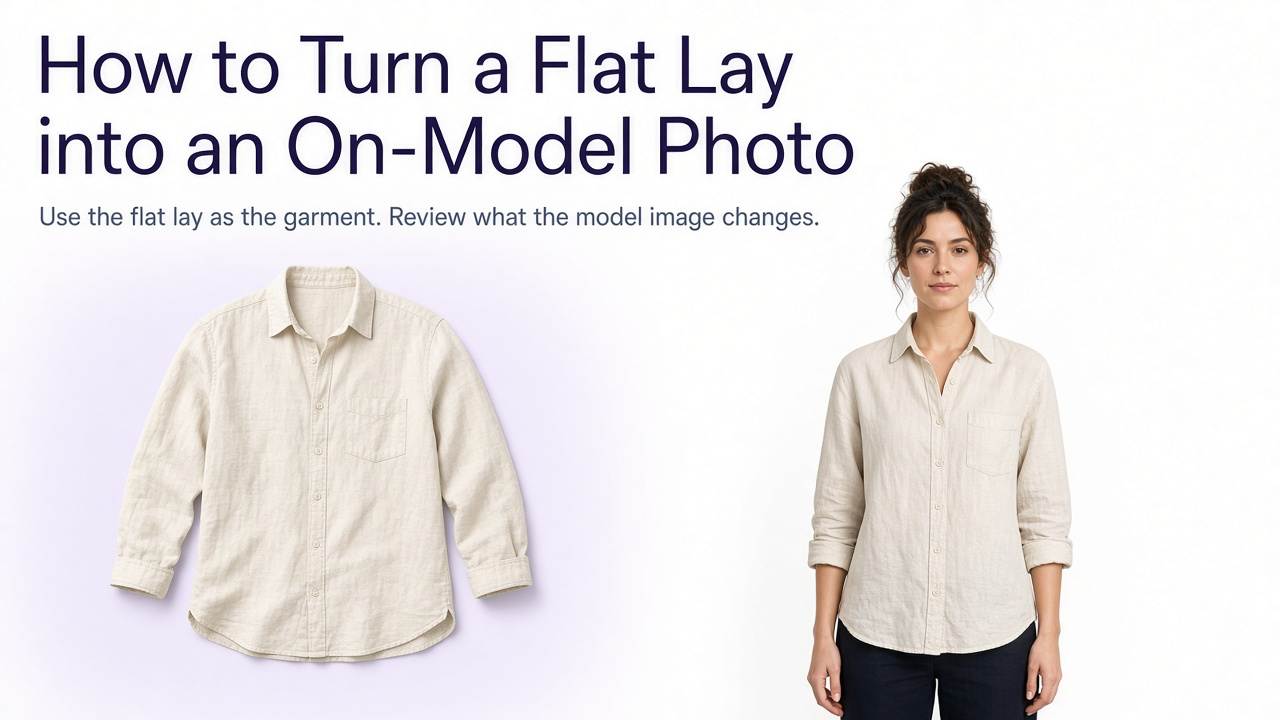
AI fashion workflows can bridge part of that gap. Instead of recreating the garment from a text description, you can use the real flat lay as the visual reference and generate an on-model presentation around it.
The quality of that result depends heavily on the source. A clean flat lay gives the system useful product information. A folded, wrinkled, cropped, filtered, or partially hidden garment forces it to guess.
What flat-lay-to-model means
Flat-lay-to-model refers to using a garment product image—usually photographed from directly above—as the clothing reference for a generated image of a person wearing that garment.
The system is not simply cutting the shirt or dress out and pasting it over a body. It has to reinterpret the garment as something three-dimensional: sleeves bend, fabric folds, the waist follows the body, and lighting changes across the material.
That reconstruction is precisely why the result needs review. The model may create a plausible worn version while changing a commercially important garment detail.
| Flat lay | On-model |
|---|---|
| Shows garment shape clearly | Shows clothing in human context |
| Good for pattern and construction | Better for visualizing length and proportions |
| Simple and inexpensive to capture | Traditionally requires model, studio, and production |
| Does not show worn drape | Can visualize worn drape, but AI-generated fit is not exact sizing evidence |
Why start from a flat lay
If the garment already exists, describing it entirely through text creates unnecessary uncertainty.
A real product photograph contains information that would be difficult to communicate perfectly in words: exact neckline, sleeve construction, print placement, stitching, buttons, zipper position, fabric texture, logos, pockets, trim, proportions, and color.
The flat lay therefore acts as product evidence. Your prompt can describe the model, pose, environment, and photographic direction while the image communicates what the garment actually looks like.
Prepare the flat lay
Start with a clean flat lay
The source photo is the most important part of the workflow.
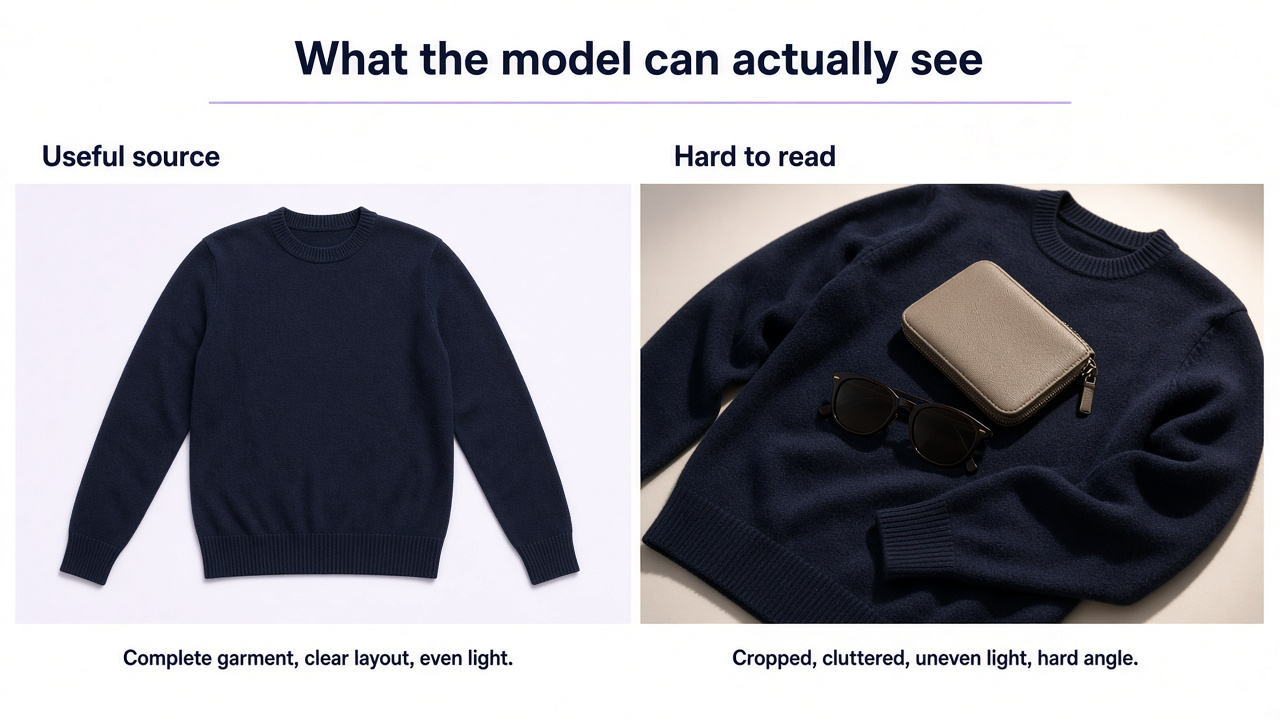
Google's current apparel try-on guidance accepts garments photographed flat on a surface, but recommends that the entire garment be visible, that excessive folds or wrinkles be avoided, and that clothing details not be covered by hands, bags, or accessories.
Strong flat-lay input
Entire garment is inside the frame
Garment is laid as naturally and symmetrically as appropriate
Sleeves and trouser legs are unfolded
Hood is visible and not covering other details
Zippers, buttons, collars, pockets, and closures are visible
No hands, bags, props, or other garments cover important areas
Color is representative of the real SKU
Background is simple and clearly separated from the garment
Image is sharp enough to inspect fabric and construction
Photograph the garment from directly above
A proper flat lay should minimize perspective distortion.
Position the camera as close as practical to directly above the clothing rather than shooting from an oblique angle. If one side of the garment is noticeably closer to the lens, proportions can become distorted before AI generation even begins.
Keep the phone or camera parallel to the surface and leave a small amount of clean space around every garment edge.
Remove wrinkles that are not part of the design
A few natural folds are normal, but excessive wrinkling can hide the actual cut of the garment.
Steam or press the item first. Straighten sleeves, hems, collars, trouser legs, waistbands, and lapels without making the garment unnaturally rigid.
This does not mean flattening away real fabric behavior. Pleats, gathers, intentional creases, quilting, ruffles, and other construction details should remain visible.
Capture the exact color and material
Garment color is a product attribute. Avoid filters, colored room lighting, dramatic warm grading, or underexposure that makes the material appear different from the real SKU.
Material is equally important. A flat lay should give the system enough information to distinguish denim from cotton, satin from matte polyester, leather from synthetic fabric, or heavy knitwear from a thin jersey.
Details worth capturing clearly
- Fabric weave or knit
- Gloss or matte finish
- Print and pattern placement
- Embroidery
- Stitching
- Leather or denim texture
- Transparency or sheerness
- Buttons, buckles, zippers, and other hardware
Photograph the back when it matters
A front flat lay cannot reliably reveal information that only exists on the back.
If a dress has a rear zipper, open back, different print placement, vent, pocket design, logo, yoke, or other back-specific construction, photograph the back separately.
The same applies to hidden interior details or reversible clothing. Do not expect a model to reconstruct an unseen design accurately merely because it can generate a plausible version.
Choose the model and the first pose
Match the model to the image job
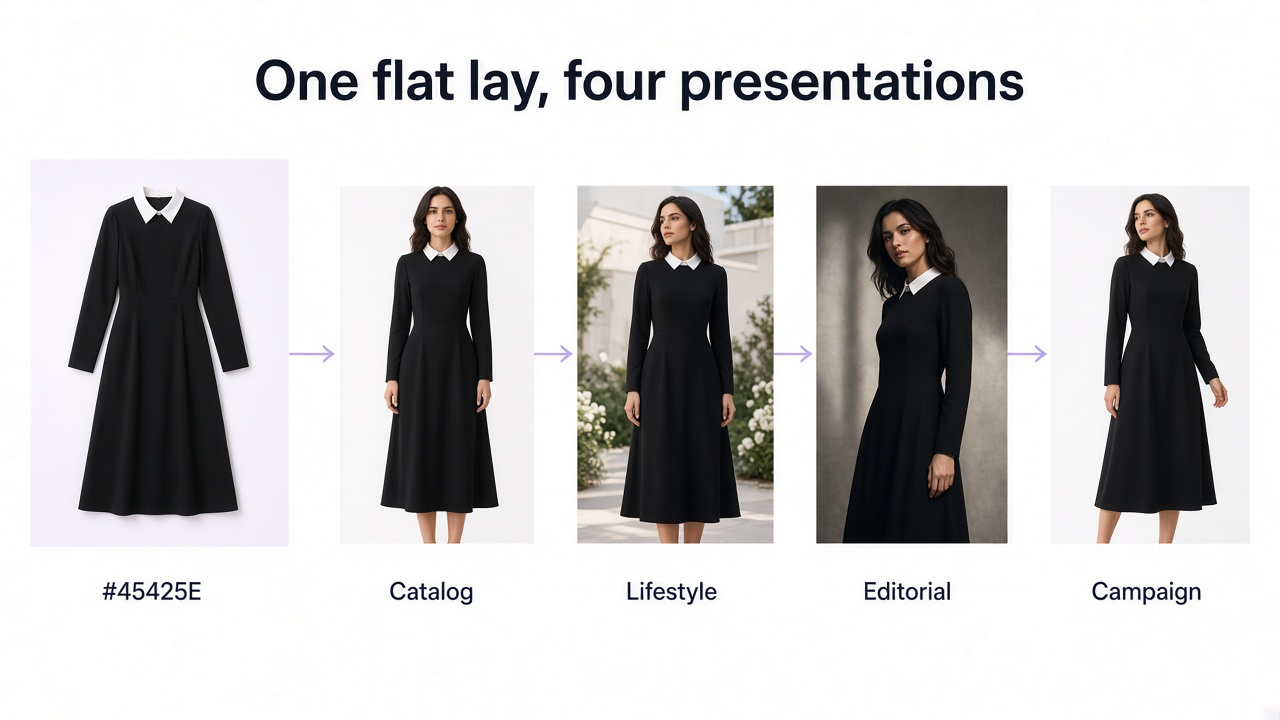
Once the garment reference is ready, decide what kind of model presentation the image needs.
For a catalog, consistency may be more important than dramatic art direction. For lifestyle or campaign imagery, model identity, pose, environment, and styling can become more expressive.
| Use case | Model direction |
|---|---|
| Ecommerce PDP | Simple front-facing or lightly angled pose with garment easy to inspect |
| Catalog | Repeatable model identity, scale, pose system, and background |
| Lifestyle | Natural pose in a believable environment |
| Campaign | More expressive pose, stronger art direction, intentional negative space |
| Editorial | Creative posing and styling while preserving garment identity |
Start ecommerce with a simple pose
The first generated on-model image should usually prioritize garment clarity rather than dramatic posing.
Google's apparel try-on guidance favors simple front-facing model poses with arms down because this keeps the garment visible and makes the source easier to interpret.
For tops, Google also recommends sleeves down, hood down, zippers closed, and tops untucked in source imagery. Those are not universal styling rules for every final photo, but they illustrate a useful principle: begin with a clean, unambiguous presentation before experimenting.
Generate the on-model image
In GenImagePro, upload the garment flat lay and choose the fashion or creative workflow appropriate to the result you want.
The uploaded product should remain the garment reference. Your instructions should focus primarily on the model, pose, environment, framing, and photography rather than redescribing the clothing.
Upload the flat lay
Use the cleanest high-resolution product image available.
Choose the model direction
Define the person, general body presentation, and whether the output is ecommerce, lifestyle, editorial, or campaign.
Define the pose
Start with a simple front-facing pose when garment fidelity is the main priority.
Choose the environment
Use a clean studio for product-focused imagery or a relevant real-world environment for lifestyle and campaign work.
Preserve the garment explicitly
Keep color, construction, print, fabric, length, hardware, labels, and other identifying details unchanged.
Generate several candidates
Compare the garment itself before choosing based on model expression or background.
Review against the flat lay
Check product fidelity at full size before publishing.
Review the garment before the picture
Check the garment before you judge the model
A generated image can have an excellent model, flattering pose, realistic skin, and attractive lighting while still showing the wrong product.
For ecommerce, product truth should be reviewed before aesthetics.
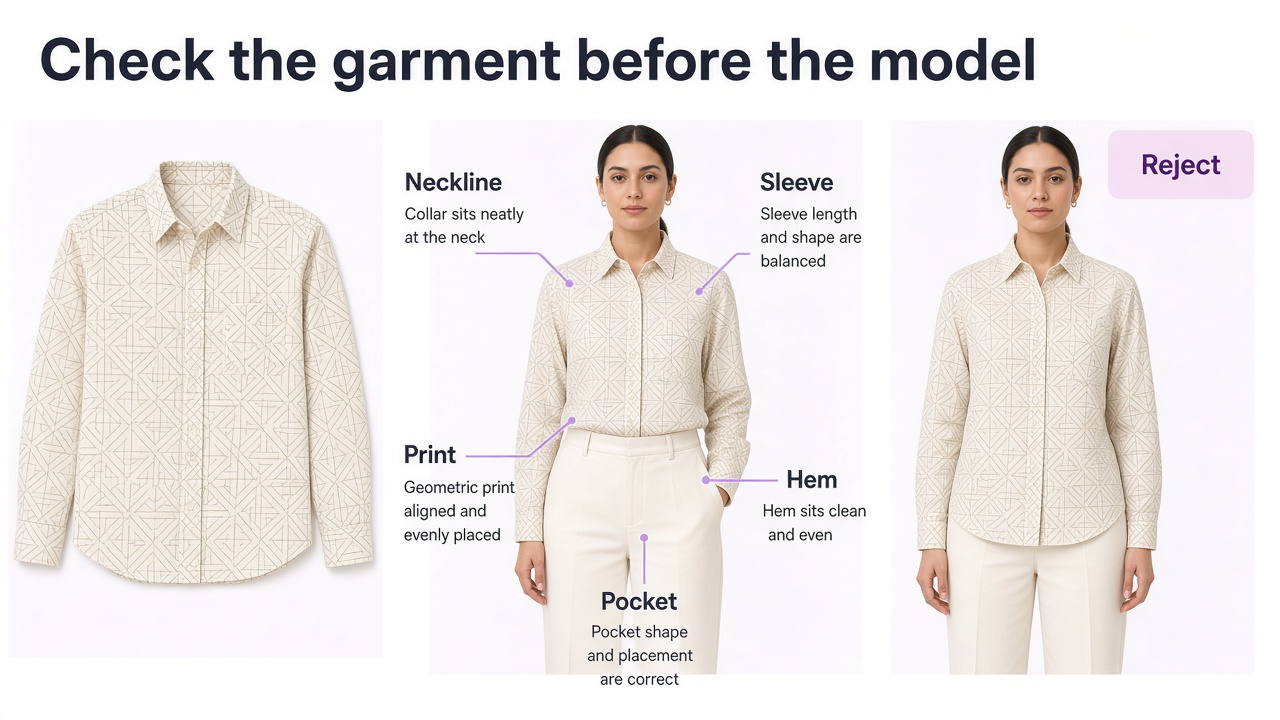
Flat-lay-to-model fidelity check
Garment color matches the source
Neckline and collar match
Sleeve type and length remain correct
Overall garment length remains plausible relative to the source
Print placement is unchanged
Pattern scale remains correct
Buttons and zippers are present and positioned correctly
Pockets remain in the correct locations
Logos and text remain correct
Fabric has not changed material
Decorative trim and hardware remain present
No new seams, straps, pockets, or details have appeared
Check prints and repeating patterns
Solid-color garments are generally simpler to verify than complex prints.
Checks, stripes, logos, typography, graphics, embroidery, and all-over patterns can stretch or shift during generation. The result may look natural on the body while no longer matching the actual garment.
Compare where the pattern intersects seams, pockets, buttons, and hems. Those reference points make subtle changes easier to spot.
Check length and proportion
A flat lay gives the AI information about garment proportions, but translating those proportions onto a generated human body introduces interpretation.
Check whether a cropped jacket has become hip-length, whether a mini skirt has become longer, whether a long coat ends at the intended area, or whether sleeves have changed significantly.
If exact physical dimensions matter, do not infer them from the generated model image. Keep garment measurements and real fit references available separately.
Treat generated fit as visualization
This is the most important limitation of flat-lay-to-model workflows.
AI can generate a believable visualization of a garment being worn. It can infer folds, wrinkles, drape, and how the clothing might sit on a body.
That does not make the result an exact simulation of physical fit.
Google says the same about its own current virtual try-on feature: generated try-on imagery is intended to help shoppers visualize style and color, but it does not show exact fit or size, and discrepancies can occur.
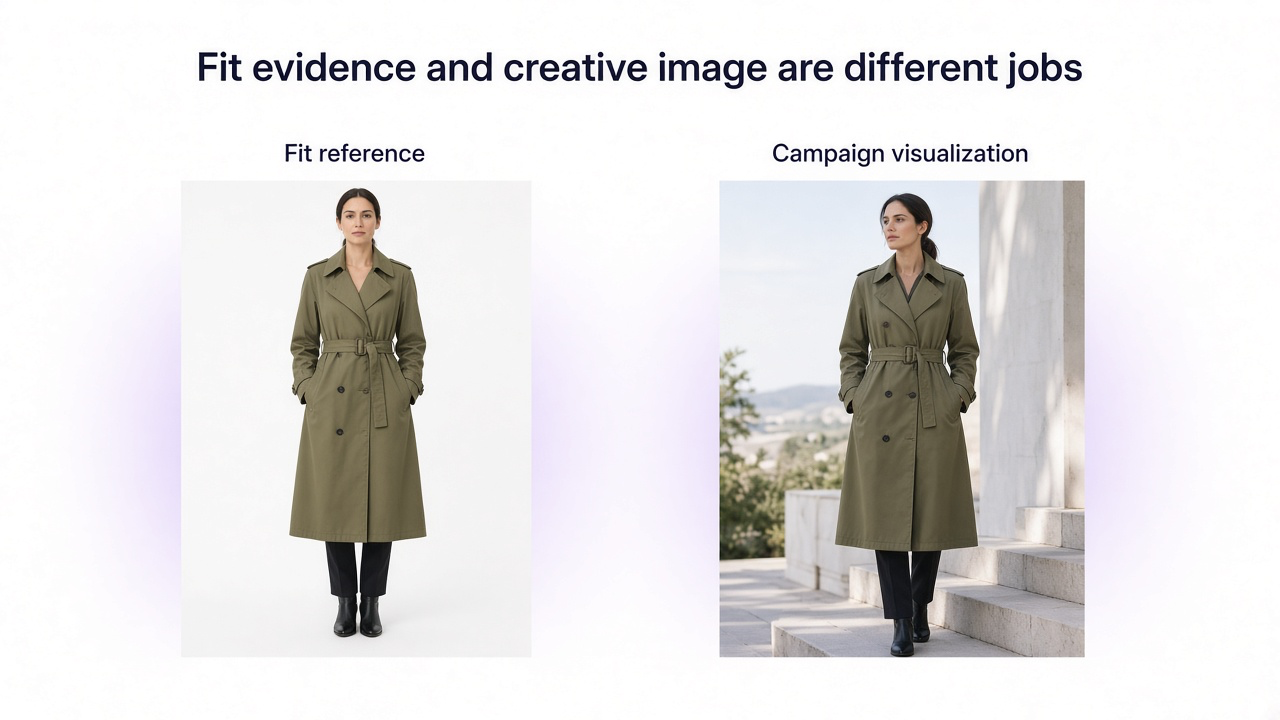
Keep a real fit reference when fit is the selling point
If fit is a major selling point, the strongest workflow may combine real and generated imagery rather than choosing between them.
Photograph one accurate real fit reference showing how the actual garment sits on a real body. Use that image for fit evidence, then use GenImagePro to expand the creative directions around the product.
This gives you both product truth and production flexibility.
Handle harder garments and full outfits
Some garments need more review
A simple front-facing garment gives the model less ambiguity than an item whose structure is hidden or difficult to understand.
| Generally simpler | Needs more review or references |
|---|---|
| Basic T-shirts | Highly structured jackets |
| Simple sweaters | Asymmetrical garments |
| Straight trousers | Layered or convertible clothing |
| Simple dresses | Complex cut-outs or open backs |
| Solid colors | Detailed graphics or engineered prints |
| Simple repeated pattern | Garments with many small trims, straps, or hardware details |
Build outfits from separate references
You can build a complete fashion look from separate garment references when the workflow supports multiple inputs.
For example, use one flat lay for a top, another for trousers, and another for footwear. Keeping each product separate gives the system a clearer source than photographing three garments overlapping in one messy flat lay.
For multi-garment outfits
Use a clean reference for each product
Keep each item fully visible
Specify which piece is top, bottom, outerwear, or footwear
Review every garment independently after generation
Check that layering has not hidden or altered commercially important details
Keep the catalog consistent, then vary the creative
Reuse the model direction across comparable SKUs
If you are converting dozens of flat lays, random model changes can make the final catalog feel fragmented.
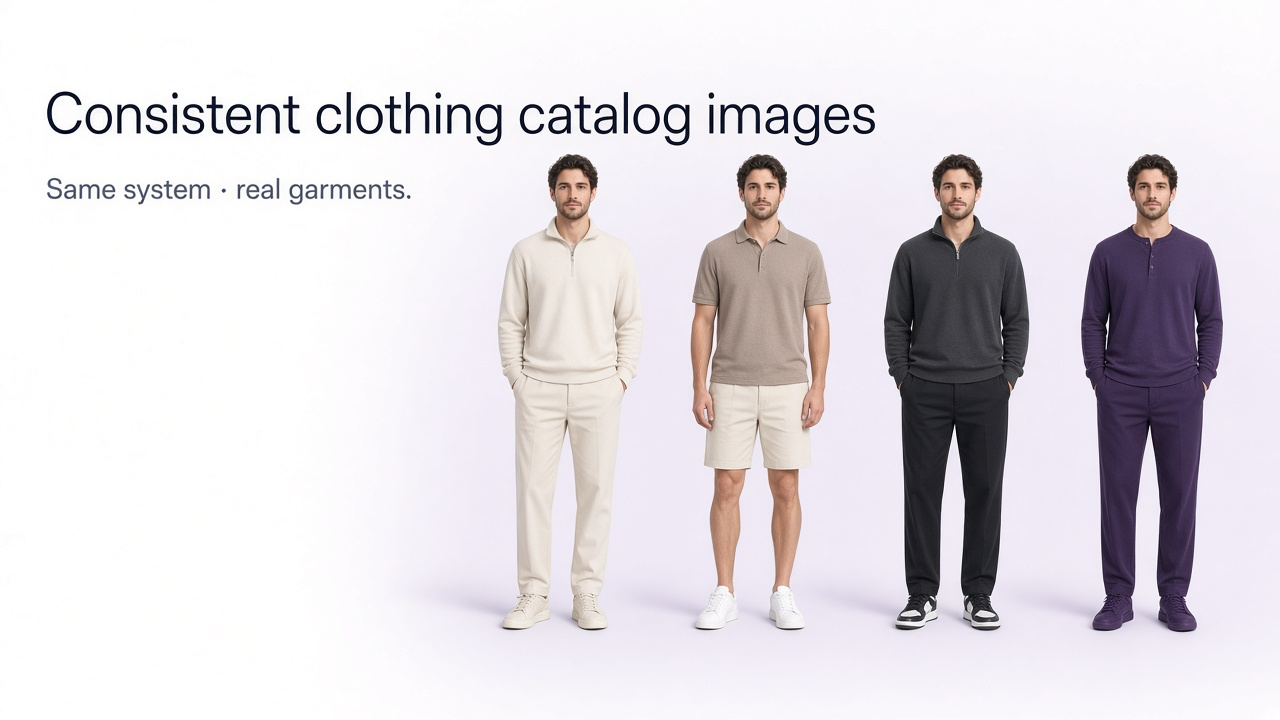
Choose a consistent model direction and reuse it where appropriate. Keep camera crop, pose family, background, lighting, model scale, and photographic treatment stable across comparable SKUs.
For a larger workflow, see How to Create Consistent Clothing Catalog Images and How to Get Consistent AI Image Results.
Do not make every image identical
- Consistency is useful, but repetition can make a catalog visually mechanical.
- Use standardized front-facing images for the core catalog, then create additional lifestyle, editorial, or campaign frames where creative variation is useful.
- The production system can stay consistent while the creative layer becomes more varied.
Add a lifestyle version after the catalog version
Once the garment has been preserved successfully in a clean on-model image, you can move into more expressive environments.
Add an editorial or campaign version
Campaign imagery can be more expressive because its job is different from the product-page hero.
Check marketplace rules separately
A strong generated fashion image is not automatically the right primary image for every commerce channel.
Google currently recommends high-resolution apparel imagery and supports garments shown flat, on mannequins, or on models for its virtual try-on workflows. Its general apparel guidance also recommends showing clothing on models where helpful and keeping the sold garment clearly identifiable.
Always check the latest rules for the destination where the image will be published rather than assuming one creative asset can serve every marketplace. For channel crops and file rules, see How to Prepare Product Images for Multiple Marketplaces.
Common flat-lay-to-model mistakes
- Using a wrinkled or folded flat lay
- Cropping the garment edges
- Letting props cover product details
- Using colored lighting that changes the real garment color
- Expecting an unseen back design to be reconstructed accurately
- Accepting a beautiful model image without comparing the clothing with the source
- Ignoring shifted prints, logos, pockets, buttons, or seams
- Treating generated drape as exact evidence of physical fit
- Generating complicated poses before establishing a clean product-focused result
- Changing too many things at once
- Using different models, crops, and lighting for every catalog SKU without a visual system
Flat-lay-to-on-model checklist
The whole garment is visible, unfolded, sharp, and true to color
A back photo exists when the back design matters
The first pose keeps the clothing easy to inspect
The generated garment still matches the flat lay
The image is a visualization, not proof of size or fit
Frequently Asked Questions
Can AI turn a flat lay into an on-model photo?
Yes. AI fashion workflows can use a flat-lay garment image as the product reference and generate an image showing a model wearing the clothing.
What kind of flat lay works best?
Use a clean, high-resolution flat lay showing the entire garment on a simple background. Avoid excessive wrinkles, folds, cropping, overlapping props, and anything that hides important construction details.
Can I use a phone photo of the garment?
Yes, provided the image is sufficiently sharp, evenly lit, color-accurate, and shows the complete garment clearly. A proper overhead flat lay is more useful than a casual angled snapshot.
Can GenImagePro turn a flat lay into an on-model image?
Yes. Upload the garment to GenImagePro and create an on-model fashion direction while using the uploaded clothing as the visual reference. Review the resulting garment against the original before publishing.
Can AI show exactly how the garment will fit?
Do not treat generated imagery as exact fit or sizing evidence. AI can visualize how clothing may look when worn, but actual fit depends on the physical garment, body measurements, size, construction, and fabric behavior.
Do I need a model reference?
A specific model reference is useful when you need a consistent person or brand identity across a series. For generic ecommerce visualization, a model direction may be sufficient depending on the workflow.
Should I photograph the back of the garment too?
Yes when the back contains commercially important details such as a zipper, print, logo, cut-out, pockets, vent, yoke, or different construction. A front-only source cannot reliably establish unseen rear details.
Can AI preserve logos and garment text?
It may preserve them, but small text and logos are fidelity-sensitive. Always compare the generated result with the original at full size and correct or reject outputs with distorted branding.
Can I create multiple models from one flat lay?
Yes. A clean garment reference can be used for multiple model or campaign directions. Keep the garment fixed and change the model, pose, background, or environment deliberately.
Can I turn separate top and bottom flat lays into one outfit?
When the workflow supports multiple garment references, separate clean images of the top, bottom, footwear, or outerwear can be combined into one on-model look. Review every item individually after generation.
Should I replace all my flat lays with on-model images?
Not necessarily. Flat lays remain useful for showing product shape, patterns, and construction clearly. On-model imagery adds human context. A strong fashion gallery can use both.